Dia de los Muertos

When pressed to name my favorite holiday, I’m a little hesitant to answer. We’ve just had an entire month of really terrific ones which involve really good food and spending time with my family (oh, and praying). Springtime also has some really good ones, but the truth is, the holiday which holds a special place in my heart falls on November 2: Dia de los Muertos, the Day of the Dead.

In Mexican-Indigenous tradition, there is a belief that our beloved ancestors and loved ones who have passed on – or returned to the source, as the Aztecs viewed it – come back to our world on this day. This return visit is celebrated with memories, blessings, good food and drink, flowers, candles, music, friends, family, and much more.  Every year, my Chicana friend and former neighbor extraordinaire Tania hosts a gathering at her home. Due to a new job she wasn’t able to host one this year, but I took piles of photos last year. I’m so happy to be able to share them with you.

Tania starts preparing for the feast long before the actual day. I’ve been lucky enough to join her and her family around the kitchen table to hand-stuff masa, a corn dough, into corn husks for tamales, a Mexican dish prepared for special occasions. She stuffs and folds hundreds of tamales, some vegetarian and some with chicken, which she then steams in huge pots on the stove. (Tania tells me that it’s traditionally made with lard, but luckily she is not an animal eater. Score one for the Jews!)

Tamales

On the evening of November 2, we arrive at her home. Bill, Tania’s wonderful husband, always prepares a trail of flower petals, which helps our beloved relatives find their way to the ofrenda, the community alter. The ofrenda is covered in pictures and symbolic memories; Tania always leaves out a cloth and water so our ancestors can wash their hands and do a little freshening up.

On top of the hundreds of tamales, Tania also prepares many more traditional Mexican dishes, including a mole, a chicken dish with a sauce made of dozens of spices including chocolate, chili and cinnamon; tomatillo salsa; nopales, an edible cactus; beans, rice; and of course, her father Oscar’s famous flan. Lots of flan, so much so that Rich and I would store eight or so in our fridge in the days leading up to the event. Our reward? An entire flan, just for us.

Chicken mole

Tomatillo salsa

Nopales -- cactus salad

Oscar's famous flan

As friends and family mingle and enjoy the Mexican feast, children spend time at the big kitchen table decorating sugar skulls.

As we finish up our meal, Tania gathers us around the ofrenda, shares words of wisdom, and invites us to share memories of our loved ones who have taken the long trip to join us for the holiday.

Boston Vegetarian Food Festival This Weekend

This weekend marks the 16th annual Boston Vegetarian Food Festival. It’s being held at the Reggie Lewis Athletic Center in Roxbury on both Saturday and Sunday. There will be lots of food to sample, cooking demonstrations to watch, and some interesting lectures to attend. My suggestion is to bring an empty stomach, a canvas bag for free samples, and an open mind. And it’s all free!

Beet Maestro

I recently came across this essay from Chez Panisse alum Tamar Adler’s new book, An Everlasting Meal: Cooking with Economy and Grace. I think the opening line really sums up an excellent life rule: “A salad does not need to be a bowl of lettuce. It just needs to provide tonic to duller flavors, to sharpen a meal’s edge, help define where one taste stops and another begins.” The entire essay is worth reading, especially in these upcoming months when our summer tomatoes are a distant memory. Root vegetables, Ms. Adler reminds us, can do much more than serve as a warm starch on the side of a plate.

Of course, root vegetables require a little more work than summer veggies. Beet preparation in particular, I have discovered by trial and error, can be a messy, messy undertaking. As much as I love steaming, pressurizing, and grating the root, the collateral damage of peeling – garnet-stained hands – can be frustrating, especially when hosting dinner guests. As a result, roasting has become my go-to beet prep method; it is the easiest, cleanest and tastiest method. At least that’s what I’ve come to believe, anyways.

I think I’ve mentioned this before, but as the Suzuki method has taught us, if I catch you early enough in your beet journey, and with constant repetition, you, too, can be a beet maestro. If you’re ever at home for more than an hour, crank up the oven to 400. Fully wrap each beet in a piece of tin foil, place them on a baking sheet to prevent drips onto your oven floor, and roast away.

Beets are very low-maintenance, so now you’re free to do whatever you want. My own tastes run towards petting the cat, reading library books, and/or catching up on the latest news via Perez Hilton – or, um, I mean, working out.

At around the 50 minute mark, test your tin-foiled beet by sliding a fork into it. If the fork does not easily slide in and out, give your beets another 10 minutes and test them again. Repeat this method until the fork pierces the beet with little to no effort, then remove from the oven. Once the beet is cool enough to handle, open the foil, head on over to the sink, stick the beet into a stream of running water and rub off the skin. It will be quick and clean, but make sure to wear an apron, just in case.

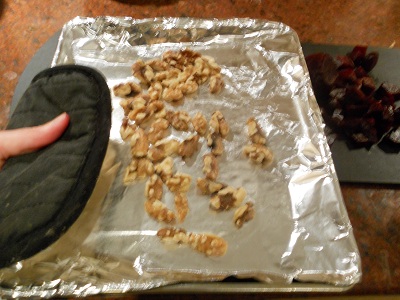
And turning your beets into an Adler-esque salad is almost as easy as roasting them. Just toss them with a quarter cup of roasted nuts and a drizzle of vinegar and olive oil. The only real work involved in this dish is making sure your nuts don’t burn. Think 325 for about seven minutes, with an eagle eye and the nose of a bloodhound.

I usually toast my nuts in the toaster oven my friend Brian bought me with his Jeopardy winnings.

(A fresh apple or two, diced into the same sizes as the beets would be a nice addition to this salad. I did not, however, add them to this salad, because fresh apples give me a bellyache, and I am going to eat this salad now that it’s been photographed.)

This blog post and ridiculously simple recipe was in support of Sweet Local Farm’s Home Grown Food Challenge.

Off The Chain

In July, as I was savoring peaches whose juices dripped down my wrist and fresh corn on the cob that required a good flossing after munching, I started wishing it was October. It was in July that I found a recipe in Melissa Clark’s In the Kitchen with A Good Appetitefor a pumpkin whose empty shell had been thoughtfully stuffed with alternating layers of toasted baguette, Gruyère, and a sauce of heavy cream and white wine steeped with sage and nutmeg. “I found this recipe,” I would say to Rich, my sister, friends, the cat – really, anyone in ear shot — “that is going to be off the chain. Off. The. Chain.”

Well, it’s finally October, which means some of the best foods of the whole year – butternut squash, beets, arugula, cauliflower and, wait for it, pumpkins – have started to appear at markets and in CSA boxes around town.  Two weeks ago, my weekly CSA list noted an inclusion of a sugar pumpkin, which meant I was this close to fulfilling my stuffed pumpkin dream.
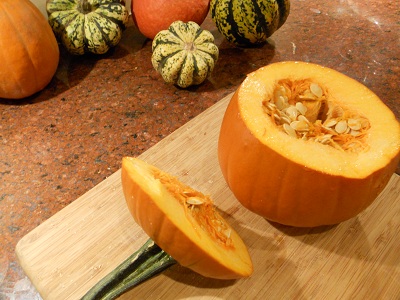
When I arrived at the student union for my usual Thursday pick up, there was a new girl checking off names. It was obvious there was no pumpkin in my box, and, even more frustrating, there was an enormous pile of sugar pumpkins on display right next to her. Rather than putting her on the spot, I thanked her for my pumpkinless box and brought it back to my office. Naturally, the only thing to do was call the farm and see how I could go about getting my rightful pumpkin at the next week’s pickup. They were totally cool about it; apparently I was the only person who either did not get their promised pumpkin – or who was crazy enough to actually call them about it. “There’s a pumpkin shortage this year!” I tried to explain to Rich.

Well, this week I received my promised pumpkin, as well as a new pumpkin in my box. So now, I can either make this dish twice, or use the second one for a terrific pumpkin pudding recipe I stumbled upon last year around this time.

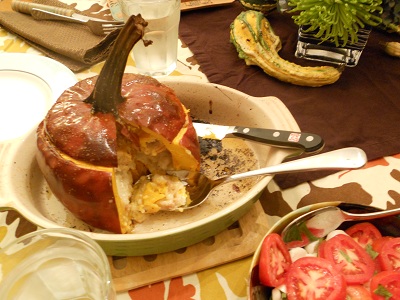
Friday night we finally had the pumpkin of my dreams. It was everything I hoped it would be: the perfect combination of softened sweet squash mixed with the savory notes of the cheese, cream and sage. It may have been one of the best things I’ve ever eaten, and I eat a lot. Our dinner guest thought the pumpkin tasted like pumpkin pizza, minus the sauce.  He suggested rather than me choosing between making this recipe a second time or making the pumpkin pudding, that I should go and find more pumpkins and make this again and again. Like I said: Off. The. Chain.
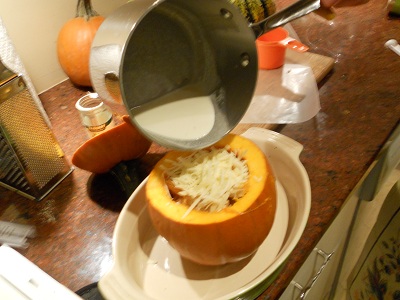
Given the cost of the Gruyère, I wouldn’t break the bank on a good one. Trader Joe’s carries reasonably priced cheeses. We’re not really big wine drinkers; lucky for us, the liquor store now carries teensy little bottles of wine.  Mine cost $1.99, and I am pretty sure I can get three more pumpkins out of it. My point is: don’t break out the good stuff for this dish. We’re lucky enough to have a sage bush growing in front of our house; please feel free to stop by and pluck some leaves if that’s the only thing stopping you from making this dish.
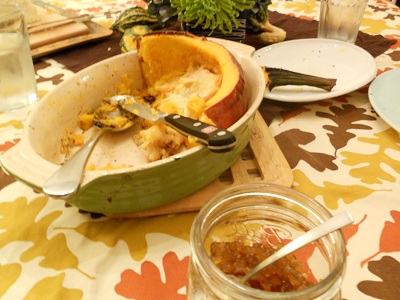
Cheesy Baked Pumpkin with Gruyère Fondue from Melissa Clark’s In the Kitchen with A Good Appetite

I think I’m a little late to the Melissa Clark fan club, as she has written and co-written dozens of cookbooks. In the Kitchen is how I imagine a good cookbook to be: excellent writing and tales followed by superb recipes. I had this book for less than five hours when I decided that we needed to have the baked flounder and eggs for dinner that night. Clark actually suggests it as a breakfast, which sounds amazing to me. And I’ve made her green goddess dressing three days in a row. She has a new book out this week, and I cannot wait to get my hands on it.

Ingredients

6 (1-inch) slices baguette

½ cup heavy cream

½ cup dry white wine

¼ cup milk

1 large garlic clove, peeled and smashed

3 fresh sage leaves

½ teaspoon freshly ground black pepper

1 (3-4 pound) sugar pumpkin, well-scrubbed

5 ounces grated Gruyère cheese (1 ¼ cups)

1 Tablespoon extra-virgin olive oil

Directions

•           Preheat oven to 425. Cut the baguette slices in half lengthwise and place on a baking sheet. Bake until golden brown, 5 to 7 minutes.

•           In a medium saucepan, bring the cream, wine, milk, garlic, and sage to a boil over medium heat. Reduce the heat to low and allow to simmer for 5 minutes. Take the mixture off the heat and discard the garlic and sage. Stir in ½ teaspoon of salt, the nutmeg, and the pepper.

•           Cut the top off the pumpkin and scoop out the pulp and seeds. (If you want to toast your own pumpkin seeds, and I always do, see the Note below.) Set the pumpkin in a baking dish. Place a layer of bread in the bottom, followed by a layer of the cheese. Poor in a third of the cream mixture. Repeat for 2 more layers and replace the pumpkin lid. Using your fingers, rub the oil all over the outside of the pumpkin and sprinkle on additional salt.

•           Bake the pumpkin until the skin blisters and the flesh is fork-tender, about 1 ¼ hours. Allow to cool in the pan slightly, then slice to serve.

NOTE: I saw this method for toasting squash seeds on Jody Adams and her husband’s new blog The Garum Factory. Like everything Jody does involving food, it’s pretty much perfect.

BONUS TOASTED PUMPKIN SEEDS RECIPE FROM THE GARUM FACTORY: Put the mass of pumpkin pulp and seeds in a large bowl and fill it three-quarters full with water. Work the pulp with your fingers to release the seeds from the fibers. The seeds will float. Skim the seeds and spread them on a sheet pan. Bake in the oven for 3-4 minutes or until dry. Remove the tray from the oven, drizzle a Tablespoon of oil over them, then season with salt, smoked paprika and a pinch of sugar. Smear everything about, then return the pan to the oven. Roast until the seeds are golden brown and crisp, about 8 more minutes.   Use as a garnish, or eat like popcorn with a great beer.

Bonus Cat Photo

‘Tis the gift to be simple

This humble, 2”x 4” piece is all that remains of the full 12″x 16” apple cake I baked yesterday. It was, I am pleased to announce, the easiest cake I’ve ever made, and quite possibly, the most delicious apple cake I’ve ever encountered. I found the recipe in a Shaker cookbook, which makes sense. Humble, simple, perfect in its simplicity, it exemplifies Shaker cooking, which the cookbook describes as “plain, wholesome food well prepared.”

I must admit, I was doubtful at first: “Is that all I have to do?” Which was soon followed by, “How is this little bit of batter going to fill up this huge pan?” Well, it did fit, just at the bottom, after I scraped it around to fill in the gaps and made sure it was even. Be sure to scrape the cracklings – the sugary crust – off the bottom and the sides, when serving. It’s the best part.

Dutch Apple Cake from Shaker Your Plate: Of Shaker Cooks and Cooking by Sister Frances A. Carr

Ingredients

1 cup sugar

2 eggs, beaten

½ cup milk

2 cups flour

2 heaping teaspoons baking powder

4 apples (the recipe calls for 6 –8, although I’m stumped as to how to squeeze in that many onto the batter PLEASE NOTE: I just made the cake and could only squeeze two apples onto the batter. My advice is to go halve by halve.)

½ cup butter or margarine, melted

½ to ¾ cup sugar

1 teaspoon cinnamon

Directions

Preheat oven to 350.

Mix the sugar, eggs, milk, flour and baking powder together. Pour mixture in a 12” x 16” pan. Pare and slice the apples. Lay them on the cake batter real [sic] closely together. Pour the melted butter over all and sprinkle the sugar which has been combined with the cinnamon. Bake until apples are tender. This should take about 30 – 35 minutes.

A Perfect Pear-ing

We had quite a busy Saturday this weekend, starting with a lovely afternoon on Cape Ann. I shared a hay bale and a microphone with some really remarkable women to discuss eating locally at the Rockport HarvestFest. While we were there, we enjoyed lots of local treats like maple-covered almonds, fresh corn chowder and homemade pumpkin whoopie pies.

Then we trucked it back to town for an evening of parties. First stop was our friends’ annual beer and cheese party. What started as a gathering of about two dozen enthusiastic beer geeks six years ago has blossomed into more than 75 people sharing their favorite pairings.

In keeping with the local spirit, we brought a 2-year aged cheddar from Shelburne Farms in Vermont. We paired it with two versions of a saison, a spicy Belgian-style farmhouse ale, by new local breweries: Mystic Brewery in Chelsea and Backlash Beer Co. in Holyoke. And although the most popular accoutrement at the party was a baby (another change over the six years), my special accompaniment was a pear chutney I churned up earlier this week. As I simmered my pears, I thought about how my attempt to prepare a locally sourced dish had ended up involving ground coriander from Asia and lemons from California. Of course, the vinegary relish is of Indian origin and is now the most popular condiment in the United Kingdom.

Me, Maggie Batista, and Jane Ward. Not pictured: Heather Atwood.

Our second party was a 30th birthday for a dear friend, and the chutney did double duty that night as a small gift for him. I had actually tagged this recipe last fall to use as little gifts for friends, but the season slipped by too fast for me. To make sure that doesn’t happen again, I have another half dozen pears resting on my dining room table, just waiting to spruce up anything from a serving of yogurt to accompanying a nice piece of fish.

Pear Chutney from Deborah Madison’s America: The Vegetarian Table (I know, I’ve become a little addicted to this cookbook.)

As Deborah writes, “chutneys are sweet and sours in a single jar. Firm but ripe fruits are the best to use – little Winter Nellis, Anjou, or Bartlett Pears that are a day shy of eating. Peaches and nectarines can also be used for this chutney.”

Ingredients

2 pounds firm pears

½ cup white sugar

1 cup apple cider vinegar

1 cup light brown sugar

½ cup golden raisins

Zest of 1 lemon

1 ½ teaspoons ground coriander

1 teaspoon minced garlic

½ cup peeled and diced or sliced fresh ginger

¾ cup finely chopped white onion

3 dried cayenne, árbol, or other slender dried hot chiles

10 whole cloves

Directions

Peel and core the pears and dice them into small pieces. Put them in a heavy saucepan with the white sugar and place over low heat. Cook until they’ve released quite a bit of juice, 10 to 15 minutes. Stir them a few times while they cook. Drain off the juice and set the pears and juice aside separately.

In a nonreactive pot, combine the remaining ingredients and bring to a boil. Add the reserved juice, lower the heat, and simmer until fine bubbles dot the surface, about 40 minutes. Add the reserved pears and cook over low heat until the pears are translucent and the sauce is quite reduced and thick, about 25 minutes more. Ladle into a clean jar, cover tightly and refrigerate. They are best served after sitting for at least a day and will keep for up to two months.

Come Hear Me Talk!

Friends, I’ve been honored with an invitation to join some fellow bloggers to discuss the question, “Does local matter when it comes to food?” at the Rockport HarvestFest on October 15. Heather Atwood, food columnist/blogger at the Gloucester Daily Times, will be moderating our discussion. We’ll be on at 4PM, but there is an entire day of festivities, including a food demonstration by Chef Frank McClelland of L’Espalier, Sel de la Terre and Apple Street Farm in Essex, a seafood throw down and live music. If you’re around, come up to Cape Ann, take in the foliage, eat some good food and listen to what will hopefully be an interesting discussion.

Miles to Go Before I Sleep

Babies, I am learning, as more and more of our friends have them, do not care about your carefully constructed plans for their arrival. They do not care if you’ve decided they will only wear cloth or Seventh Generation diapers; if it’s not working for them, they’ll be sure to let you know.

Our friends Amanda and Quentin hosted us for a fabulous vegetarian Mexican meal at their house in August. Amanda was due in mid-October, and we heard about their wonderful midwife they had chosen, the birthing center across from the hospital where Amanda would birth their son. We also discussed their plans for spending the last few weeks of September and early October cooking freezable meals to be eaten at a later date, because cooking with newborn babies is not something that happens.

Well, as it turned out, Miles Timothy had other plans. He zipped into the world, at one in the morning on September 29th, in their bedroom! Practically perfect in every way, Miles, and his new mother and father – who delivered him! – were escorted to the hospital by some very nice firefighters.

Everything worked out, although Miles’s surprise entrance meant that all those meals that were to be cooked before his arrival never got made. Knowing their time was going to be limited for the next few, well, 18 or so years, I spent a little time on Sunday whipping together some freezable meals for the new parents. Amanda is a vegetarian, so I felt that making a casserole, although filling and definitely freezable, wouldn’t necessarily have the protein she’d be needing. Although some babies have trouble digesting their mother’s milk if she’s eaten legumes, I decided to go with chickpeas and brown rice.

Rice, as well as quinoa, freezes and reheats without any trouble.  So when I started making the dish, I tossed a few cups of brown rice with water, a ratio of 3:1, in the rice cooker. Easy peasy. I dug around my cookbooks for a good recipe for something chickpea-based, but came up short. As it turns out, Deb from Smitten Kitchen, went through the same chana masala quest a few years ago and ended up blending a few recipes. I used hers with a few adaptations.

In order to drop the temperature of the dishes without having them sit out and collect bacteria, I placed the cooking vessels in ice water. After the chickpeas and rice were cooled down, I placed them into freezable plastic containers, and brought them to the new parents. We had a quick visit and got to meet Miles in all his perfect tininess.

Chana Masala

Adapted from a Deb from Smitten Kitchen, who adapted it from a Madhur Jaffrey recipe, which had also been adapted.  This was a perfect pantry recipe, as I had everything on hand.

Ingredients

1 Tablespoon vegetable oil

2 medium onions, minced

1 clove garlic, minced

2 teaspoons grated fresh ginger

1 fresh chili pepper, minced (Deb called for a hot green one, I found a random Hungarian pepper in the bottom of my crisper and just went with it. Feel free to use whatever hot pepper you enjoy, or leave it out if heat’s not your thing.)

1 Tablespoon ground coriander

2 teaspoons ground cumin

½ teaspoon ground cayenne pepper

1 teaspoon ground turmeric

2 teaspoons paprika

1 teaspoon garam masala

1 15 ounce can of whole tomatoes with their juices, chopped small (you’ll need 2 cups worth if you’re using fresh)

2/3 cup water

4 cups cooked chickpeas or 2 (15 ounce) cans chickpeas, drained and rinsed

½ teaspoon salt

½ lemon, juiced

Directions

Heat oil in a large skillet. Add onion, garlic, ginger and pepper and sauté over medium heat until browned, about 7 minutes. Turn heat down to medium-low and add the coriander, cumin, cayenne, turmeric, paprika and garam masala. Cook onion mixture with spices for a minute or two, then add the tomatoes and any accumulated juices, scraping up any bits that have stuck to the pan. Add the water and chickpeas. Simmer uncovered for 10 minutes, then stir in salt and lemon juice.

Borei Pie HaGafen

For many American Jews, the Concord grape is synonymous with our traditions and holidays; a local ice cream chain, JP Licks, even sells a Manischewitz grape sorbet during April to celebrate Passover. In fact, when Rich and I were first dating, his Nana Parr – one of the best bakers I’ve ever met; I have the sugar cookie recipe, and will post it, promise – thoughtfully gave me a bottle of the sweet wine for the holidays. Granted, my parents were never big Concord grape wine fans – they’d be much more likely to serve a newly discovered gem from the Golan or perhaps something from Napa – but the flavor reminds me of grape juice, which was always the kiddie option at our table. The irony, of course, is that this Jewish flavor is also the most American taste out there. The grape was developed only a couple of miles from where I’m writing this, about 150 years ago.

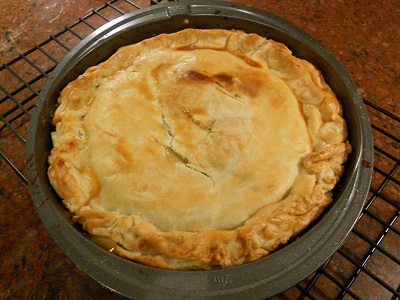
All this is to explain why I choose to forgo bringing last year’s perfect plum cake to my parents’ for Rosh Hashana this year, and why I instead brought this Concord grape pie, made with the white grapes from my CSA. Deborah Madison writes, “This pie is truly America’s own, made from our native Concords in the northeast and Midwest, or Muscadines in the south.”

Before you scroll down to the recipe and say, “No thank you, that looks like way too much effort,” hear me out. This recipe doesn’t need to be made all at once. In fact, you’re better off doing it in separate steps. I made the ridiculously simple crust, which requires refrigeration, on Monday night, and then made the pie on Tuesday. And that part about separating the grape skins? Rich came and helped me with that step, and we were done in less than 10 minutes. And the food mill, which I know I’ve made the case for in the past, once again serves its purpose in getting rid of those pesky seeds.

We ate this pie for dessert on the second night of Rosh Hashana, after enjoying a dairy meal which was washed down with our pomegranate cocktails. My mom had the great idea to serve it with a scoop of ice cream and sprinkle berries on top. I doubt our purchase of Friendly’s granola and honey frozen yogurt is going to save the company from bankruptcy, but the flavor worked perfectly for this dish. This pie, as my friend Audrey exclaimed while enjoying the final slice, tastes like the good parts of Passover. Obviously, this recipe won’t work Pesach, let alone you’d be hard pressed to find ripe Concord grapes in April, but you can certainly make this for Succot later this month.

Concord Grape Pie from Deborah Madison’s America: The Vegetarian Table

Makes one 9-inch double crust pie; serves 6 to 8

Pie Crust

2 ½ cups all-purpose flour

½ teaspoon salt

12 Tablespoons ( ¾ cup ) unsalted chilled butter, cut into small pieces

6 to 7 Tablespoons ice water

Filling

2 ½ pounds purple or white Concord grapes

½ to ¾ cup sugar

4 to 6 Tablespoons all-purpose flour, or 1 Tablespoon quick-cooking tapioca

Grated zest of 1 lemon

1 to 2 Tablespoons fresh lemon juice, to taste

1 egg, beaten with 2 Tablespoons heavy cream or milk

Directions

To make the pie crust, stir together the flour and salt in a bowl. If you have a pastry blender, cut in the butter until the mixture forms coarse crumbs. Without a pastry blender, using two knives or your fingers, cut the butter until the mixture forms coarse crumbs. Using a fork, stir in the water one tablespoon at a time, adding only enough for the pastry to hold together when pressed. Gather the dough into a ball and divide into two pieces, one slightly larger than the other. Wrap in plastic wrap and refrigerate.

To make the filling, pluck the grapes off their stems. You should have about four cups. Pinch them out of their skins, putting the insides into a saucepan and the skins into a bowl. Put the pan over medium heat, add ½ cup sugar, and cook until the grapes turn white, about three minutes. Pass them through a food mill placed over a bowl to rid them of their seeds, then add the skins to the pulp. Taste and, if it seems sour, add the remaining sugar while the pulp is still hot. Whisk in the flour or tapioca (use the larger amount of flour if the grapes were watery) and add the lemon zest and lemon juice. Let the mixture stand while you roll out the pie.

Preheat an oven to 450 degrees F. On a lightly floured board, roll the larger piece of dough into an 11-inch round. Ease it into a 9-inch pie pan and press it gently against the sides. Add the filling and brush the edges with water. Roll the second piece into a 9-inch round, set it over the filling, and crimp the edges. Make two slashes on the top for vents, and brush with the egg mixture.

Set the pie on a baking sheet in the center of the oven. After 10 minutes, lower the heat to 350 degrees F and bake until the crust is nicely browned, about 25 minutes. Remove to a rack and cool. Serve warm.