Sophomore Slump

One hundred posts in, and I’m still making the same rookie mistake: I haven’t yet learned I need to photograph all my cooking and baking projects, and not just ones I aim to post on this here blog. And what’s even sillier on my part is the fact that I’ll sometimes be dining with other people who do photograph everything they’re about consume, like my friend Rachel who took some really beautiful photographs of every dish of our dinner on Saturday night. (Quick review: extremely affordable, very tasty, and terrible service. I’ll probably be back.)

I think I’ve just committed the most egregious example of this mistake with this savory tart filled with roasted vegetables, caramelized onions and smoked mozzarella. I had no plans to make this, nor blog about it. Nope, had no dreams about how well the sweetness of the onions would bounce off the smoky cheese that had melted in between the layers autumn vegetables that had been wrapped in a savory, flakey crust. Nope, not a thought.

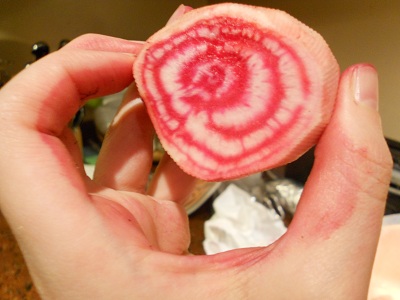
What I had planned on taking a picture of was the butternut squash. Not because I wanted to do anything with it for the blog, but because I wanted to document its size. It was the largest squash I’d ever seen — my guess is one and a half feet high and about 15 pounds. It was roughly as tall as my cat, but clearly outweighed him by five or so pounds. I had wanted to photograph the cat standing next to the squash, but I totally forgot to do it until I had cut off the top of the squash on Sunday night in order to whip together some butternut squash risotto. After I had cleaned and cubed the chunk of squash – there is still a chunk of squash in the fridge that hasn’t been touched, about the size of a regular butternut squash – I realized I had way too much squash on hand. So I decided to roast the leftover squash, and while I was at it, I might as well toss in some other roots I had hanging around my crisper. So out came some beets, a few carrots, and a handful of red potatoes from the cupboard. I did call Rich in at one point to take a photo of the striped Chioggia beet because I was so taken by its beauty. Can you believe this came out of dirt? I asked him.

So I peeled and cubed my root veggies, tossed them altogether in a bowl with a few glugs of olive oil and a healthy pinch (make that two pinches) of salt, and dumped it all in a large lasagna pan. I decided at the last minute to lay down a few sprigs of thyme on top. My goodness, I said to myself, all those colors, it’s as pretty as a picture.  I then covered it with foil, and tossed the pan into a 400 degree oven. I know, ridiculous, right? To see it, say it, and then do nothing about it. So silly!

About 20 minutes in, I checked the veggies, gave them a stir, and then 25 minutes after that, I removed the foil, gave everything a stir, turned the oven down to 350, and baked them for about 15 minutes more. I then removed the pan from the oven, admired how all the pinks and oranges looked like a sunset, and then taste-tested a few of the different veggies to make sure they had all softened sufficiently. Once they cooled, I moved them to some Tupperware and put them in the fridge.

This next part is something that I often grapple with on this blog: using ingredients that aren’t exactly inexpensive. Last week I was poking around the cheese case at the market around the block when I stumbled upon a very nice hunk of smoked mozzarella. It was some sort of Manager’s Special that day, and was discounted $3. I bought the cheese – I mean, wouldn’t you? – but figured I wouldn’t mention it on the blog because I couldn’t very well go and expect people to go and buy a pricey bit of cheese for something, even though I bought it at a discount.

So, I was sitting at my desk at work thinking about my ball of cheese and my roasted vegetables when it occurred to me that those two things might taste very good together. But I didn’t want to mash them into a sort of hash and put them in a pie dish and melt the cheese on top. And that’s when it dawned on me: this would be the perfect opportunity to try out a savory version of Jacques Pepin’s apple galette with some fresh herbs added to the dough. And, I asked myself, wouldn’t the tart be so much better if some caramelized onions were involved?

And that’s when I kicked myself for not photographing my roasted root veggie prep. I did not know any of it was going to end up on Cheap Beets, but now it has, if but with a truncated version of the photography. Sure, some of you might take note that this is the third version of some sort of rustic tart on my blog – in a row, no less. Some of you might even call it cheating. But I don’t think you’ll really mind.

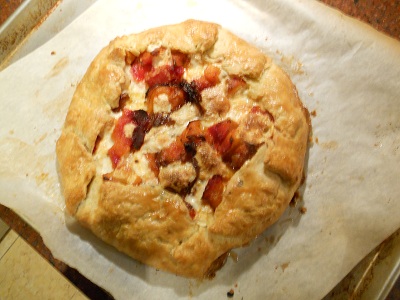
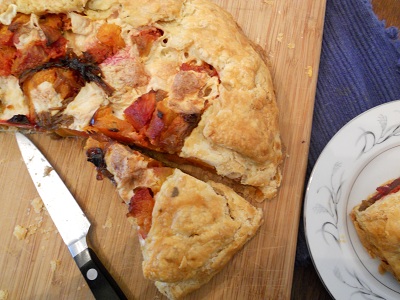
Rustic Roasted Root Vegetable Tart with Caramelized Onions and Smoked Mozzarella.

This is four separate recipes in one, just as the roasted pear and cranberry crostata was. I followed my own advice this time and made each part on a different night. Of course, I hadn’t actually planned it that way, but tarts really are what happen to you while you’re busy making other plans.

Part One: Roast approximately three cups of root vegetables – I suggest butternut squash, beets, carrots and potatoes – according to the description above.

Part Two: Make the savory crust

Crust Ingredients

1½ cups all-purpose flour

½ teaspoon salt

1 stick plus 2 tablespoons cold unsalted butter, cut into small pieces

1/3 cup ice water

1 teaspoon fresh sage, ripped into small pieces

1 teaspoon fresh thyme

Directions

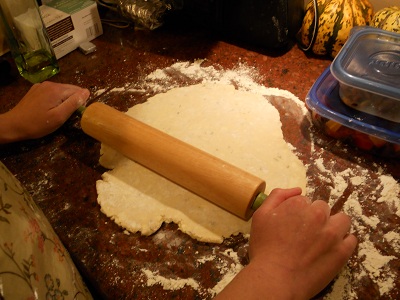
In a food processor, combine the flour with the salt, butter and fresh herbs and process for about 5 seconds. Sprinkle the ice water over the flour mixture and process until the pastry just begins to come together, about 10 seconds; you should still be able to see small pieces of butter in it. Transfer the pastry to a work surface, gather it together and pat into a disk. Wrap the pastry in plastic or wax paper and refrigerate until chilled. (You can also roll out the pastry and use it right away.)

Part Three: Caramelizing the onions

Ingredients

3 red onions, cut in half, laid flat, then sliced into ¼ inch thick half moons

Olive oil

Salt

Directions

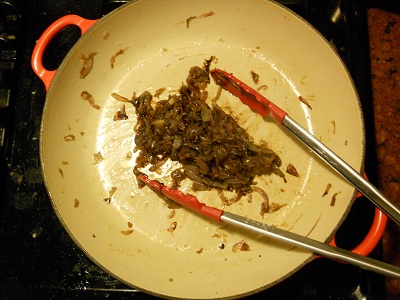
Place the onions in a deep 4-quart saucepan and drizzle and toss with olive oil to coat, about ¼ cup. Set over medium heat and, shimmying the pan occasionally, cook until the onions are slightly golden on the edges. Stir occasionally – it might take as long as 25 minutes of slow, slow cooking — then stir in a few pinches of salt. Stew, stirring occasionally, until the onions are amber colored and tender but not mushy, another 20 minutes or so. If at any point the onions look as if they may dry out, cover them to trap some of the moisture in the pan. Taste for salt. You should get about 1 cup cooked onions.

Part Four: Assembling the Tart

All of the previous ingredients can be made beforehand and refrigerated for approximately three days.

Ingredients

¾ cup smoked mozzarella, cut into ½ inch pieces

Savory dough

Caramelized onions

Roasted root vegetables

1 egg, lightly beaten

Directions

Preheat the oven to 400°. On a lightly floured work surface, roll out the pastry to a circle and transfer to a large rimmed baking sheet.

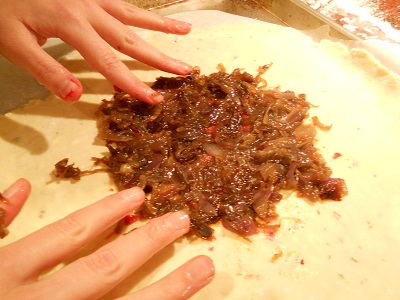
In the center of the pastry, lay out all but one quarter of the caramelized onions.

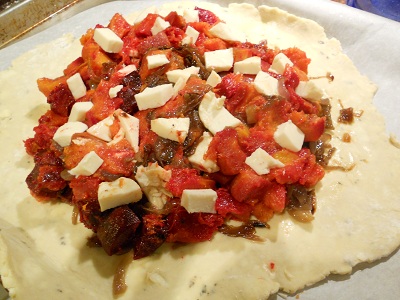
Lay two thirds of the mozzarella on top of the onions.

Using a spoon, gently place all of the root veggies on top of the cheese.

Distribute the remaining onions and pieces of cheese on top of the vegetables.

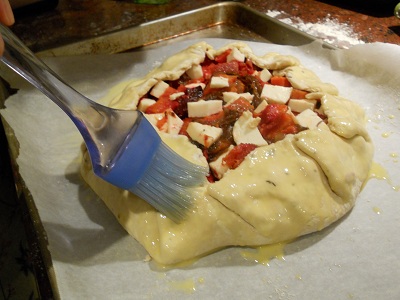
Fold the pastry edge up and over the vegetables to create a 2-inch border.

Brush the folds of the crust with the beaten egg.

Bake the tart for about 1 hour, until the pastry is nicely browned and crisp. Transfer the pan to a rack and let the tart cool. Serve warm or at room temperature.
Relationship Status: It’s Complicated

If you believe that fancy, complicated desserts are what bakeries were invented for, carry on, nothing to see here. However, if you love days-long baking projects which result in the most extraordinary of desserts, guaranteed to elicit oohs and ahs around the Thanksgiving table, continue reading, because, boy, oh boy, do I have a recipe for you!

Seriously, the making of this dessert, from Joanne Chang’s flour cookbook, falls into the “redonkulous” category. The book’s subtitle “Spectacular Recipes from Boston’s Flour Bakery + Café” is a completely accurate description. If you want to impress your in-laws, your boss or just plain love a challenge, this is it.

Rich and I baked this roasted pear and cranberry crostata last January during a blizzard. We figured we weren’t going anywhere and I had some extra pears lying around from a chutney project. It took an entire day to prepare. It’s basically the opposite of the idiot-proof Jacques Pepin apple gallete recipe that takes 15 seconds to prepare.

Hindsight is 20/20, and if I was to do it again, I would prep each piece of this dessert one step at a time over a three day period. It’s much more manageable that way. And don’t worry if you start on this project and soon realize you’re really not in the mood to take it all the way through. The pate brisée can be refrigerated for up to four days, and frozen for up to a month. I think the roasted pears, tossed with ginger, butter and sugar, makes a scrumptious dessert on its own. Or over ice cream – it’s up to you, really. And the frangipane, well, you can just spoon that right into your mouth if you like.

ROASTED PEAR AND CRANBERRY CROSTATA from Joanne Chang’s flour: Spectacular Recipes from Boston’s Flour Bakery + Cafe

Makes one 9-inch crostata (serves 8 to 10)

Ingredients

9 Bosc pears, peeled, halved and cored

1-inch knob fresh ginger, thinly sliced

½ cup (100 grams) granulated sugar

¼ cup (1/2 stick/56 grams) unsalted butter, cut into 4 pieces

Pâte Brisée (recipe follows)

Frangipane (recipe follows)

1 cup (100 grams) fresh or frozen cranberries

1 egg, lightly beaten

2 Tablespoons sanding sugar, pearl sugar, or granulated sugar

Directions

Position a rack in the center oven, and heat the oven to 400 degrees F. Line a baking sheet with parchment paper.

In a 9-by-13-inch baking pan, toss together the pears, ginger, granulated sugar and butter. Roast, stirring occasionally, for 1 to 1 ½ hours, or until the pears are soft when pierced with a knife tip and golden. Let cool completely. (The pears can be roasted for up to 5 days in advance and stored in an airtight container in the refrigerator.)

Remove the dough from the refrigerator. On a well-floured work surface, roll out the dough into a circle about 12 inches in diameter and ¼ inch thick. Place the dough circle in the prepared baking sheet.

Using the back of a spoon or a small rubber spatula, spread the frangipane in the middle of the dough round in a circle about 9 inches in diameter, leaving a 3-inch border uncovered.

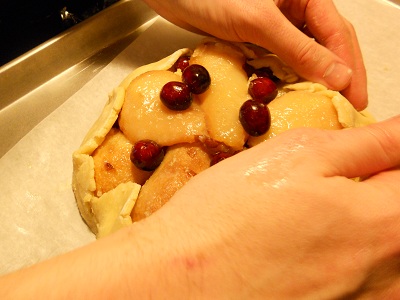
Place about 8 pear halves, cut-side down, in a circle in a single layer on the top of the frangipane, lining them up with the edge of the frangipane and with the stem ends pointing toward the middle. Place 1 or 2 pear halves in the center to cover the frangipane circle completely. Sprinkle ¾ cup (75 grams) of the cranberries evenly on top of the pears. Top the first layer of pears with a second layer of pears, using about 7 halves and reserving 1 pear half, arranging them in a smaller concentric circle. Sprinkle the remaining ¼ cup (25) grams of cranberries evenly on top of the second layer of pears.

Place the reserved pear half on a cutting board. Using a paring knife, and starting at the squat bottom end, cut four or five lengthwise slices, stopping just short of the stem end. Fan the slices, and place the pear half in the center of the second layer of pear halves. Starting at one side of the crostata, fold the 3-inch border of dough up and over the fruit, forming six to eight loose pleats around the perimeter and pressing the pleats firmly together onto the fruit. The center of the crostata will remain exposed in a 3-to 4-inch circle, showing off the fanned pear. Refrigerate the assembled crostata for at least 1 hour before baking. (At this point, the crostata can be covered with plastic wrap and stored in the refrigerator for up to 1 day before baking.)

Position the rack in the center of the oven, and heat the oven to 350 degrees F.

Brush the pleated pastry with the beaten egg, then sprinkle evenly with the sanding sugar. Bake for about 1 hour and 20 minutes, or until the pleats are golden brown. Make sure all of the folds are evenly browned, so there are no chewy underbaked bits of dough in the finished crostata. Let cool in the pan on a wire rack for at least 2 hours. Serve warm or at room temperature.
The crostata can be stored in an airtight container at room temperature for up to 2 days.

PÂTE BRISÉE

Makes about 10 ounces dough, enough for one 9-inch single-crust pie, 10-inch crostata, or 9-inch quiche

Ingredients

1 cup (140 grams) unbleached all-purpose flour

2 teaspoon sugar

½ teaspoon kosher salt

½ cup plus 1 Tablespoon (1 stick plus 1 Tablespoon/128 grams) cold unsalted butter, cut into 8 pieces

1 egg yolk

2 Tablespoons cold milk

Using a stand mixer fitted with the paddle attachment (or a handheld mixer), mix together the flour, sugar, and salt. Scatter the butter over the top and mix on low speed for about 45 seconds, or until the flour is no longer bright white and holds together when you clump it and pecan-size lumps of butter are visible throughout.

In a small bowl, whisk together the egg yolk and milk until blended. Add to the flour-butter mixture all at once. Mix on low speed for about 30 seconds, or until the dough barely comes together. It will look really shaggy and more like a mess than a dough.

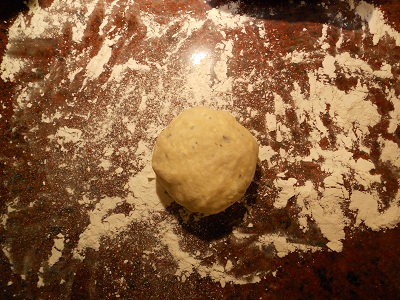
Dump the dough out onto an unfloured work surface and gather it together into a tight mound. Using your palm and starting on one side of the mound, smear the dough bit by bit, starting at the top of the mound and then sliding your palm down the side and along the work surface, until most of the butter chunks are smeared into the dough and the dough comes together. Do this once or twice on each part of the dough, moving through the mound until the whole mess has been smeared into a cohesive dough with streaks of butter.

Gather up the dough, wrap tightly in plastic wrap, and press down to flatten into a disk about 1 inch thick. Refrigerate for at least 4 hours before using. The dough will keep in the refrigerator for up to 4 days or in the freezer for up to 1 month.

FRANGIPANE

Makes about 1 cup

Ingredients

1/3 cup (50 grams) blanched whole almonds, or ½ cup (50 grams) almond flour

¼ cup (1/2 stick/56 grams) unsalted butter, at room temperature

¼ cup (50 grams) sugar

1 egg

2 teaspoons unbleached all-purpose flour

1/8 teaspoon vanilla extract

Pinch of kosher salt

Directions

If using whole almonds, grind them in a food processor as finely as possible without turning them into paste. Set aside.

Using a stand mixer fitted with the paddle attachment (or hand-held mixer or wooden spoon), cream together the butter and sugar on medium speed for 1 to 2 minutes, or until light. Add the ground almonds or almond flour and beat on medium speed for 1 minute, or until thoroughly incorporated. Stop the mixer and scrape the bottom and sides of the bowl.

On low speed, beat in the egg. Add the all-purpose flour, vanilla, and salt and mix until combined. You should have about 1 cup. Use immediately, or store in an airtight container in the refrigerator for up to 1 week, then let sit for a few hours at room temperature before using. Or, freeze in an airtight container for up to 3 weeks, then thaw it in the refrigerator before using.