And The Beet Goes On

“They’ll keep,” my mom reassured me once I told her how I’d accidentally bought seven pounds of golden beets from the local farm collaborative. This is a bit of a problem for me: I have a hard time judging proportions. I once accidentally bought nine cubic yards of soil for a garden. 

While some might find this to be a nightmare scenario, my love of beets went into overdrive. (I mean, I did name this blog after them.) The first few pounds we juiced in the juicer I picked up this fall through the Buy Nothing Northampton Facebook Group. After we cleaned up the kitchen, I roasted another three pounds and enjoyed them throughout the week. On Monday night we had roasted beet Reubens, made with sauerkraut from Real Pickles, and bread from Rise Above Bakery in Greenfield. 

On Tuesday, I reached for my Ultimate Nachos cookbook for some Taco Tuesday inspiration. Although there was a recipe for beet, apple and goat cheese nachos, I landed on “The Joker Guacamole,” because, well, guacamole. The recipe was clearly intended to be made with red beets to end up purple and green, like the Clown Prince of Crime. My beets’ golden color meant my guacamole wasn’t stained, but neither were any of my cutting boards nor my hands. I cut back on the amount of garlic and lime juice in the recipe below because it was too strong.  

I also made queso because cheese sauces are generally something that makes me happy. This recipe dirties two saucepans and takes a bit of attention and time, but it was totally worth it. I used Cabot sharp cheddar cheese and it was perfect. I felt like I was at a ballgame as I dipped my tortilla chips into the cheese sauce and mound of mashed avocado. Even Lilli, my picky eater, enjoyed the cheese sauce on top of pasta that night. 

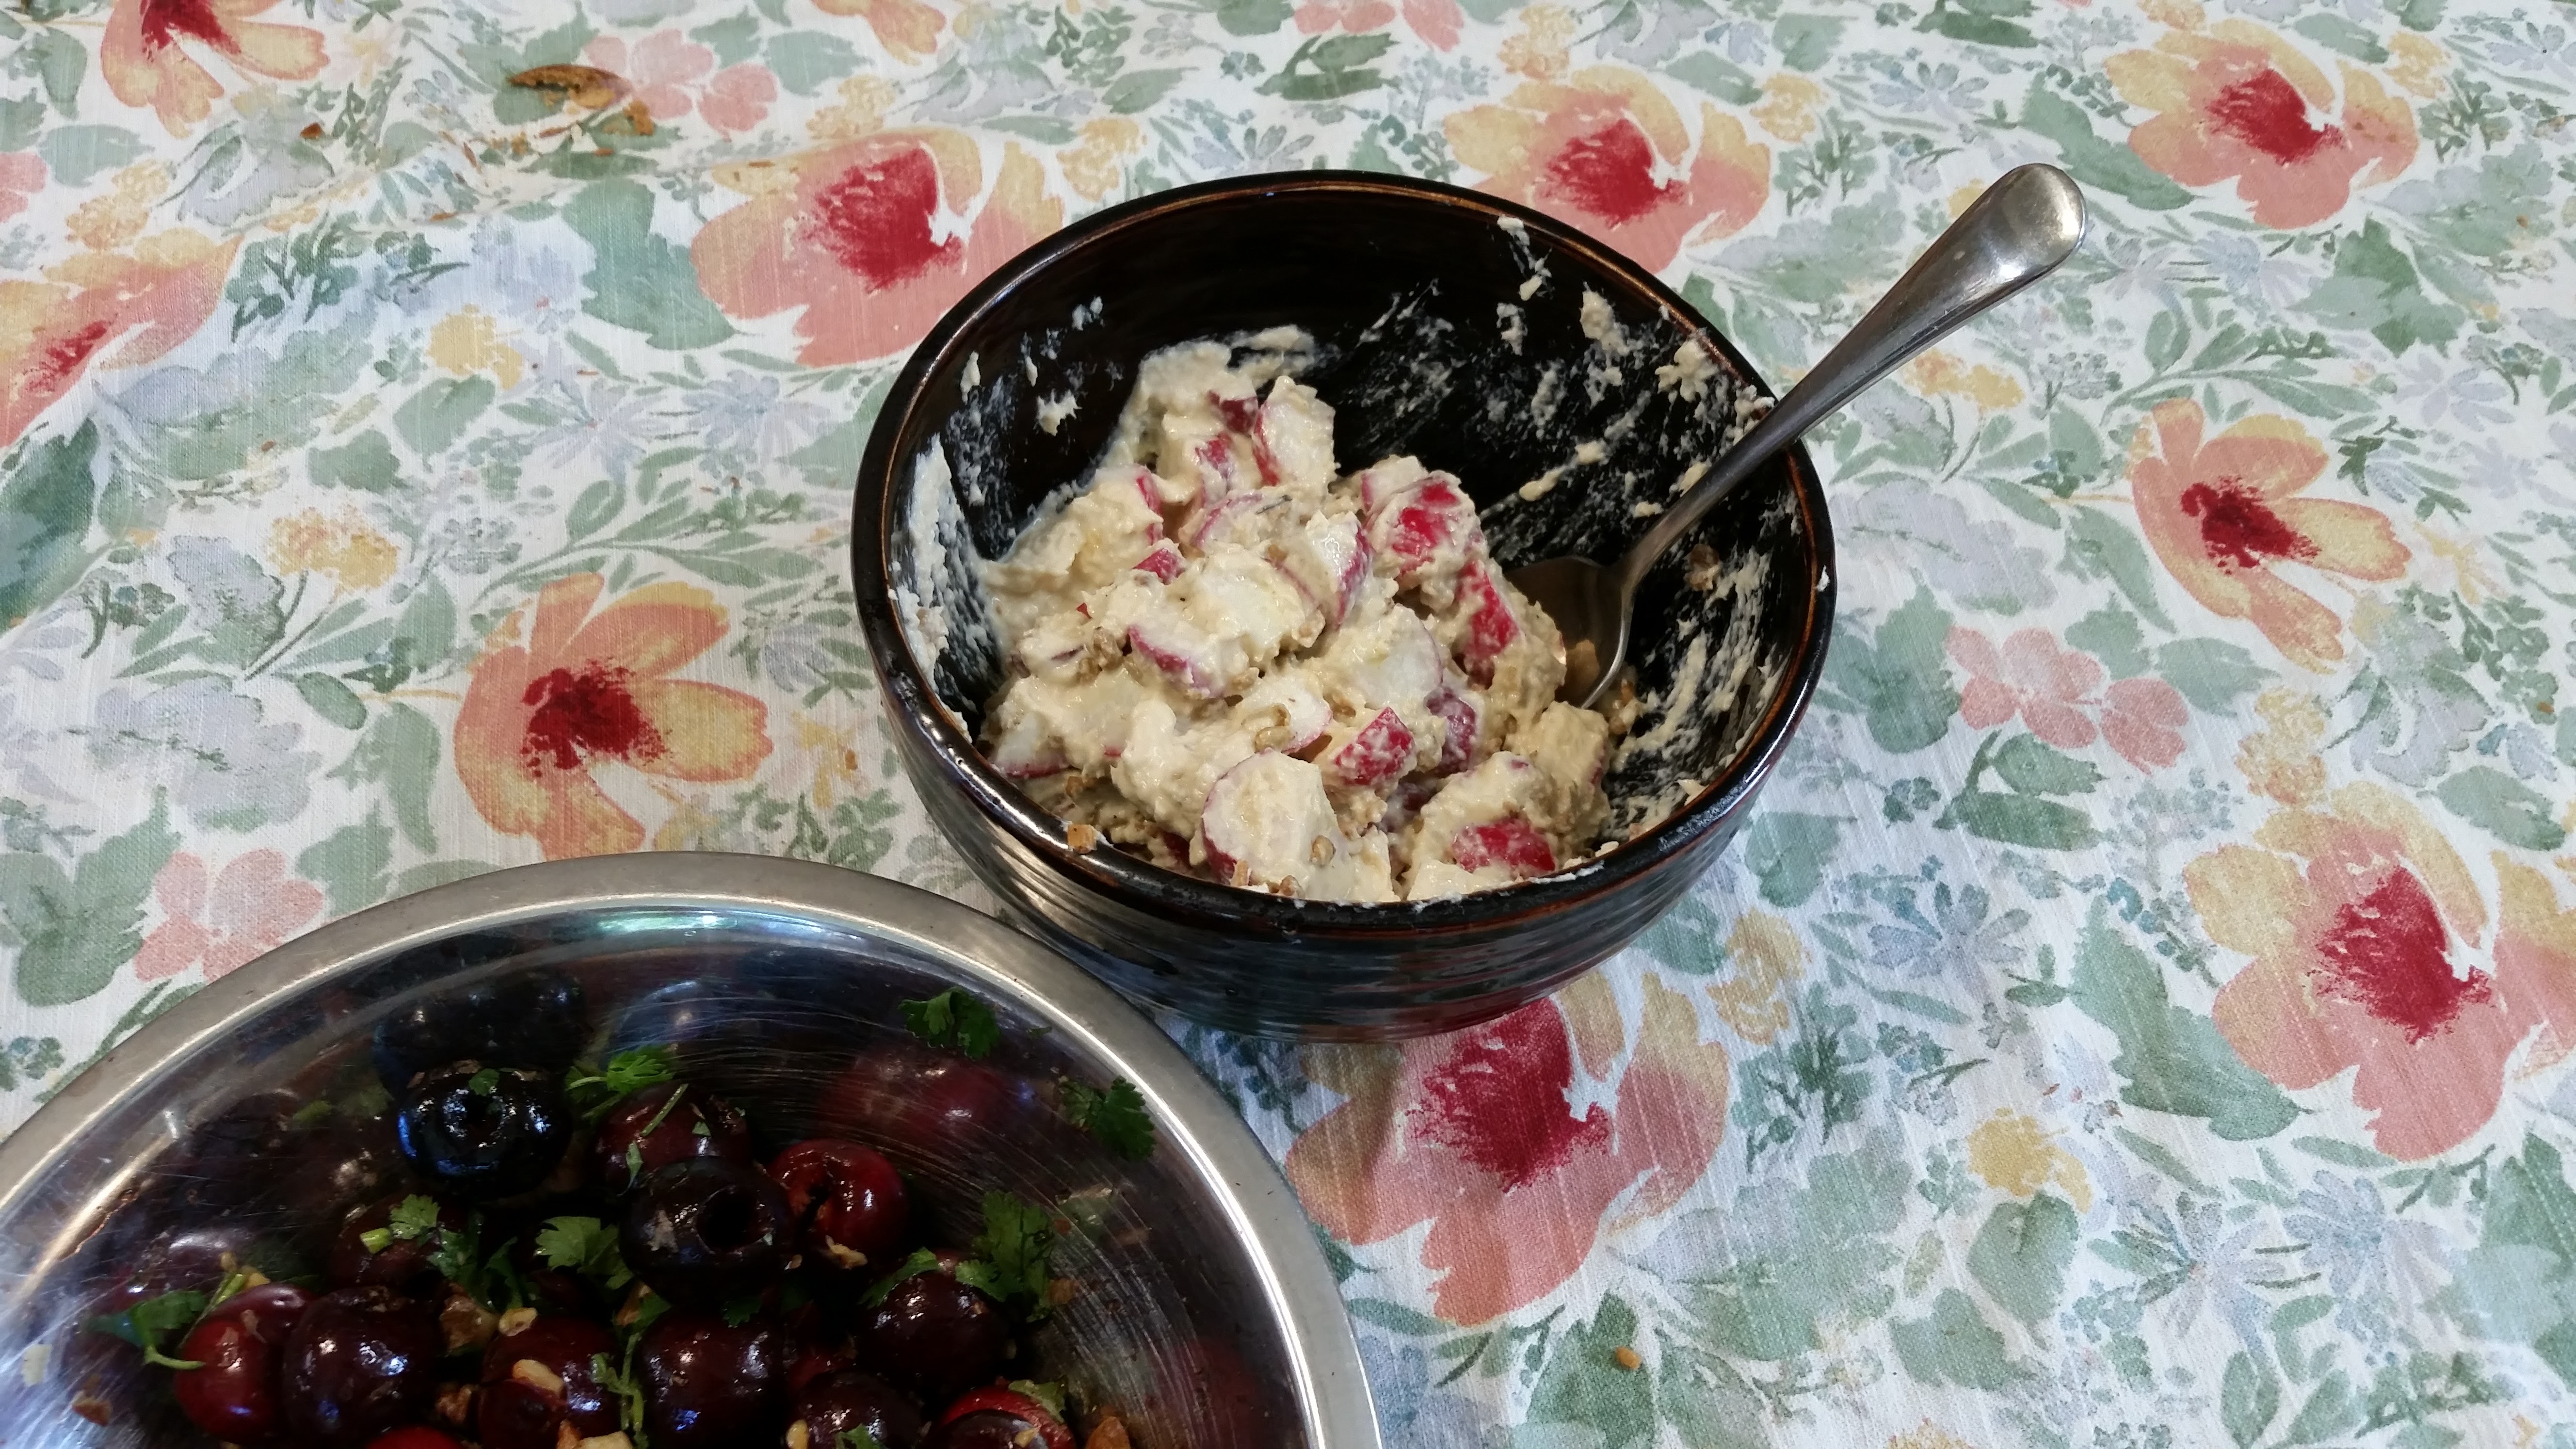
The rest of the week we enjoyed beets in salads, with hummus in sandwiches, and tzatziki. They also featured in a fresh “Winter Roll” with sprouts, arugula, roasted butternut squash and raw carrot with a peanut sauce.

There’s a single golden beet left, and you might be think I would be done for a while. But I just roasted a (much more reasonable) batch of red beets and have started using them. And the circle of life continues.

Beet Guacamole and Bechamel Cheese Sauce (Queso) from Ultimate Nachos by Lee Frank & Rachel Anderson

Beet Guacamole

Ingredients 

2 avocados, halved lengthwise, pitted, and flesh scooped out

1 garlic clove, minced

Juice of 1/2 lime

Salt and pepper

1 small roasted beet, trimmed, peeled and grated

Directions

In a medium bowl, mash the avocados with the garlic and lime juice, using a fork

Season with the salt and pepper

Fold in the beet. Do not overmix. 

Season again with salt and pepper to taste. 

Bechamel Cheese Sauce

2 tablespoons unsalted butter

2 tablespoons all-purpose flour

2 cups whole milk 

8 ounces melting cheese of your choice, shredded (about 2 cups)

Salt and pepper

Directions

In a medium saucepan, melt the butter over medium-low heat. 

Add the flour and stir until a smooth paste forms, 5 to 6 minutes. 

Meanwhile, in a separate pan, heat the milk until it is just about to boil. Be careful not to burn the milk. Burnt milk is cringe-worthy. 

Gradually add the hot milk to the butter mixture, and whisk continually until smooth. Bring the sauce to a boil. 

Cook for 10 minutes, stirring constantly, then remove from the heat, immediately add the shredded cheese, and stir together until evenly incorporated. 

Season the cheese sauce with salt and pepper to taste. 

There is a Season

This summer started with a furlough. It’s not an ideal situation, but I’m trying to make the most of it. Introducing my new cooking column – There is a Season – in the Daily Hampshire Gazette. My column runs on Saturdays, but you can find me online any day. If you like what you see, consider buying a subscription and helping me support local journalism. 

If you were wondering, it was my editor who came up with the name. He offered me a few, but I loved There is a Season because it’s punny and so true. It also reminds me of Ecclesiastes, and since one of my degrees is actually Bible, it makes me smile.

For my first week I did a variation on an old Cheap Beets favorite: a savory galette. I’m not going to reprint the full recipe here, but it’s really more a template that you can fill with whatever vegetables you have coming your way this summer.

Magic Tofu

I did a quick glance through the past few posts that I managed to get up on this site, and I’m slightly embarrassed to realize they are all desserts. And what’s more, I came to tell you about our local and sustainable Rosh Hashana, with a recipe for a scrumptious carrot cake. 

20191001_182005.jpg

Lest you think we eat dessert all day long, I will instead share a recipe I’ve been meaning to post for months now. It’s actually a recipe that I’ve already shared, but with enough tweaks that it is a completely different beast. It’s now the best darn tofu I’ve had in my life. 

20190625_183717.jpg

Remember the special, special tofu that people flipped for last year? Well, I’ve made it better. And instead of a three-day marinade, this is now a less-than 20 minutes from start to finish recipe. First you’re going to blot dry your tofu, then cut it up, toss it with some corn starch, then fry it in a nonstick pan. Flip it, fry the other side, pour the sauce on top of your golden, crisped up tofu. Soon enough, you’ll be looking at the prettiest, glossiest tofu. And it tastes even better than it looks. 

There is one thing about this recipe that has stopped me from posting: It tastes best right out of the pan. I can’t figure out how to reheat the leftovers, so you’ll need enough people to eat all the tofu. Unless you want to stuff yourself, but please don’t do that!

The Best Tofu You’ve Had in Your Life, adapted from Saladish by Ilene Rosen

Ingredients 

1 (14 oz [400 g]) block extra-firm tofu 

2 to 3 Tablespoons (16 to 24 g) cornstarch

1 Tablespoon  (15 ml) oil, for pan

Sauce

2 Tablespoons mirin

3 Tablespoons seasoned rice vinegar

4 ½ teaspoons flavorless vegetable oil

1 Tablespoon Tamari

1 Tablespoon honey 

Directions

Drain the tofu and squeeze it between your hands over the sink to get the excess water out. Slice it into cubes, or slabs. Sprinkle 1 heaping Tablespoon (about 8 to 12g) cornstarch into a large container, add the tofu in a single layer , then sprinkle another heaping tablespoon (8 to 12g) of cornstarch. If you can, cover the container and shake to coat the tofu with cornstarch.

In a large nonstick skillet, heat the oil over medium-high heat. Add the tofu in a single layer and fry, flipping once when golden, until crispy on both sides, about 4 minutes per side. (While the tofu is frying, prepare the sauce.) Lower the heat to medium and pour in the sauce. Let the sauce simmer and thicken for a couple of minutes, flipping to tofu to coat it on both sides. 

Serve immediately. 


Anytime Tofu

I just sat down to share my Rosh Hashana menu from last month, but then had second thoughts because that was 12 dishes, plus three desserts. I will say this about that meal: The unsaid goal of the meal I set for myself was to build up to such a crescendo that by the time dessert was served, the vegans would want to eat the all three cakes served. Mission accomplished.

20181007_110919.jpg

Making Chocolate Granola.

But I worry I would bore you with all the details. I will instead, in honor of the vegans who were willing to eat the honey, share this tofu dish which I now have to keep in a Google Doc because people keep asking me for the recipe. It started, as it does quite frequently, at a Tot Shabbat. A little boy enjoyed the tofu so much that he declared that tofu was now his favorite food in the world and demanded his mom track down the recipe. I tripled the recipe at Rosh Hashana and have been pleasing folks right and left, since.

It’s from Saladish, which I wrote about last time I found my way here, and I’m OK still talking about this cookbook because it is such a good one. I marinate my tofu in a gallon-size Ziploc bag for a good three days before roasting and serving it. It’s actually part of a salad that I’ve never completed because I’m so stuck on the tofu.  

20181008_104047.jpgI always skip the sambal oelek to make sure young mouths won’t find it too spicy. I also cut up my tofu before putting it in the marinade, although the recipe is written to soak it whole.

Tofu (From a recipe called “Vietnamese-Style Tofu Salad” from Saladish by Ilene Rosen)

Marinade

2 tablespoons mirin

2 tablespoons sambal oelek (skip this because I skipped it. Too spicy for little ones.)

3 tablespoons seasoned rice vinegar

4 ½ teaspoons flavorless vegetable oil

1 tablespoons tamari

1 tablespoon honey

Directions

Marinate the tofu: Whisk all the ingredients for the marinade together in a bowl. Transfer to a covered container or plastic storage bag. Add the tofu and turn it over several times so it is well coated. Cover or seal and refrigerate for at least 1 day, and up to 5 days – the longer the better – turned the tofu (or bag) occasionally.

Preheat the oven to 425F.

Set the tofu on a sheet pan, reserving any excess marinade. Swipe the tofu around to grease the pan. Cut the tofu horizontally in half, then cut the still stacked halves into quarters. Cut the quarters in half to form triangles and spread them out on the pan. [Or, you can cut the tofu before marinating.]

Baste the tops with the reserved marinade and bake for 10 minutes. Then flip the tofu over and return the oven for another 10 minutes. Let cool, then serve.

Change of Schedule

I truly thought my next post was going to be about fruit, or the next few posts, when I really think about it. With three sour cherry trees out back, countless blueberry bushes, and brambles of thick black raspberry bushes, a fruit post only made sense.

20170705_180209.jpg

But life moves pretty fast. Tonight I texted Rich, “I hope you’ll be home any minute, because dinner is amazing and I’m worried there won’t be any left by the time you get home.” I thought it best to share the dish with you all, if only so I have a record to go back to.

The dish in question is Radishes with Tonnato, Sunflower Seeds, and Lemon. It’s from Joshua McFadden’s Six Seasons: A New Way with Vegetables, a book I’d read about and finally got from the library last week. When I saw this recipe, I knew it was a keeper. Honestly, this whole book is a keeper. I was on page 46 out of 396 when I remarked out loud, to no one in particular, that I thought I was going to need to actually purchase this book, rather than keep it out until the library hunted me down. I still have to make the Caper Raisin Vinaigrette, and since I’ve already earmarked this week’s CSA summer squash for a summer squash cake for Tot Shabbat, the Squash and “Tuna Melt” Casserole will have to wait until next week.

20170629_180121.jpg

Today’s recipe is technically in the Spring section, even though I think we are now in Midsummer. But considering that asparagus keeps growing in my front yard, I think I get a pass. Tonnato is a tuna sauce, and here it’s spiked with fresh lemon, then tossed with fresh radishes and toasted sunflowers. The recipe also calls for a small handful of fresh mint. I didn’t have any on hand, but I’m thrilled with the dish, as is.

I’m a tuna fanatic, be it on a bed of sushi rice or mashed with mayo in a salad with celery, bread and butter pickles and handfuls of fresh herbs, but this here might be my new favorite way to enjoy it. Last year I’d gotten into buying tuna in oil, to toss with fresh pasta and chopped olives and capers, so I’d had a can in the house. Although the basic tonnato recipe calls for two cans of tuna, the radish salad says to use half the recipe, so the one can I had on hand was perfect.

I served this alongside this fresh cherry and herb salad. I actually couldn’t find the hot pepper I swore I had in my crisper, so I used a pinch of Aleppo pepper in its place. The whole dinner felt fresh and amazing — the first of many to come with all the fresh fruits and veggies coming my way.

Radishes with Tonnato, Sunflower Seeds, and Lemon by Six Seasons: A New Way with Vegetables Six Seasons: A New Way with Vegetables by Joshua McFadden

Serves 2 as a main dish, 4 as a side

Ingredients

½ recipe Tonnato (to follow)

Juice of ½ lemon

2 bunches radishes, greens trimmed off and reserved for another dish, radishes halved or quartered

1 small handful of mint leaves

Kosher salt and freshly ground black pepper

¼ cup sunflower seeds, lightly toasted

1 small handful sunflower sprouts, optional

Directions

Put the tonnato in a large bowl, squeeze in a couple of tablespoons of lemon juice, and stir to mix. Add the radishes and toss to coat.

Add the mint and season well with salt and pepper. Taste and adjust with more salt, pepper or lemon juice.

Add half the sunflower seeds and sprouts (if using). Toss, then top with remaining seeds and sprouts. Serve soon.

Tonnato

Makes about 1 ½ cups

Two 5-ounce cans oil-packed tuna, drained

¼ teaspoon kosher salt

About 1/3 cup good quality mayonnaise (such as Hellmann’s or Best Foods)

¼ cup extra-virgin olive oil

About 1 tablespoon fresh lemon juice

Directions

Put the tuna and salt in a food processor and pulse until it’s blended. Add 1/3 cup mayonnaise and pulse until the ingredients are getting creamy. With the processor running, drizzle in the olive oil and lemon juice and process until the tonnato is very smooth and creamy.

Taste and add more mayonnaise, olive oil, lemon juice, or salt. Store in the fridge for up to 1 week.

More Ways to Use It:

Use as a dip for any raw, grilled or roasted vegetables.

Spread of slices of veal.

Thin it out with more lemon juice and toss with boiled and smashed new potatoes or add it to a romaine salad.

Spoon it on bread and top it with Soft-Cooked Eggs, tomatoes and capers.

Use it in a charred broccoli dish.


Dining Out, Dining In

20170513_120144.jpg

Dining out, for me at least, means ordering something on the menu I can’t reproduce in my own kitchen. The more I cook and bake, if in part, perhaps to keep on providing you with fresh ideas for your own table, means the list of dishes I’ll eat out grows smaller. Good for my wallet, especially with the exorbitant cost of childcare. (Seriously, you’d pass out if I told you what we spent in 2016 for our two precious girls.) There are some dishes I just can’t nail – baingan bharta, for example, is one that I will always order in a restaurant because I just can’t do it in my own kitchen. Hummus, too, I just can’t get right, although I recently heard a tip I need to try: run the food processor an extra 2 minutes, to help aerate it. We’ll see if that helps.

Chinese food is another that tends to taste better from a restaurant. But I had good luck with this Sweet and Sour Tofu-Vegetable Stir-Fry. It’s from Everyday Vegetarian: A Delicious Guide for Creating More Than 150 Meatless Dishes from the editors of Cooking Light. This recipe is exactly what you would have at the restaurant. Seriously, it’s spot-on. I’m an admitted broccoli junkie, and I freely admit to making this twice in a 4-day period. Rich, who would never willingly order tofu or request it of his own choosing, gladly ate this dish.

One of the nice features of cookbooks from magazines, like this one, is that there’s a full cadre of writers and cooks to test recipes. This cookbook has been more thoroughly vetted than the current president’s cabinet members. There are eight sections in the cookbook, plus an opening on the “Everyday Vegetarian Kitchen.” I’m looking forward to trying many of the recipes here, including Lemony Zucchini Pitas with Quick Pickled Dill Carrots and Spinach and Feta Quiche with Quinoa Crust. I have a feeling they will be as spot-on as the stir-fry.

20170608_123741.jpg


This week’s recipe was one of the recipes I’d accumulated during my broken computer hiatus and set aside until it was in season. Now that broccoli has arrived in this week’s CSA haul, I’m so so happy to share this one with you now.

Maybe also because it’s from a mainstream publication, they often “suggest” using ingredients like Uncle Ben’s in the Warm Brown Rice and Chickpea with Cherries and Goat Cheese, or Swanson’s when stock is needed. As I get older, short cuts in the kitchen like that make more and more sense to me, but I’ll leave what brands to use to your best judgement.

I made quite a few substitutions of my own. I never have dry sherry in the house, so I used sherry vinegar, which was a perfect substitute. I didn’t have fresh hot pepper in the house and used a pinch of red pepper flakes instead. Although the recipe calls for Broccolini, I used broccoli florets. I also skipped the carrots. I can’t stand cast-iron and never used my wok so I didn’t pack it when we moved, so I used a non-stick skillet. Yes, I am aware I spent time talking about how spot on this recipe is, then followed up by talking about the alterations I made to it. But I know the little tweaks I made wouldn’t change the flavors or texture of the recipe. And that’s what cooking is all about. It’s trickier to do that with baking, though.

Although the header notes say, This dish is mildly spicy; to make it extra kid-friendly, omit the chile from the sweet and sour sauce.” Beatrix, who at least tasted it because it was broccoli, something she will still eat, announced it was “too spicy,” and spat it out. Her loss, because this dish is fantastic.

Sweet and Sour Tofu-Vegetable Stir-Fry from Everyday Vegetarian: A Delicious Guide for Creating More Than 150 Meatless Dishes By the Editors of Cooking Light

Ingredients

1 (14-ounce) package water-packed extra-firm tofu, drained

3/4 cup water

1/3 cup rice vinegar

2 Tablespoons sugar

4 garlic cloves, minced

2 Tablespoons dry sherry (I used sherry vinegar, which was a perfect substitute.)

2 Tablespoons ketchup

2 Tablespoons finely chopped red hot chile (with seeds), such as red jalapeno or Thai chile (I used a pinch of red pepper flakes instead.)

1 Tablespoon cornstarch

1 ½ Tablespoons lower-sodium soy sauce

2 Tablespoons canola oil

½ teaspoon salt

1 red bell pepper, seeded and cut into ¼-inch-thick slices

2 carrots, diagonally cut into 1/8-inch thick slices

1 (8-ounce) bunch Broccolini, cut into florets and stems cut into ½-inch pieces (I used broccoli florets.)

2 cups cooked brown rice

Directions

Place the tofu in a shallow dish. Place the paper towels on top, and weight with a cast-iron skillet or other heavy pan. Let stand 20 minutes, pressing down occasionally. Discard the liquid, and cut the tofu into 2 x ¼-inch pieces.

While the tofu stands, combine ½ cup of the water, vinegar and sugar in a small saucepan, stirring to dissolve the sugar. Stir half of the garlic into the sugar mixture. Stir in the sherry, ketchup, and chile. Cook the mixture over medium heat until boiling. Remove from the heat; stir in the cornstarch, stirring with a whisk until smooth. Stir in the soy sauce.

Heat a large cast iron skillet or wok over high heat. (I used a non-stick skillet.)

Add 1 Tablespoon of the oil swirl to coat. Add the tofu in an even layer; cook, without stirring, 2 minutes. Turn the tofu; cook 2 minutes. Place on a plate; sprinkle with the salt.

Add 1 teaspoon of the oil to the pan; swirl to coat. Add the bell pepper; stir-fry 2 minutes. Add the remaining garlic; stir-fry 10 to 20 seconds. Remove to the plate with the tofu. Add the remaining 2 teaspoons oil to the pan; swirl to coat. Add the carrots; stir-fry 1 minute. Add the Broccolini; stir-fry 3 minutes or until the water evaporates. Return the tofu mixture to the pan. Add the sauce mixture; stir to coat. Place the rice on each of 4 plates. Place the tofu mixture over the rice.


You Don’t Have to Take My Word for It

Do you ever come across a recipe that haunts you until you make it? It doesn’t happen to me that often, but it’s happened a few times in the past couple of weeks with one cookbook in particular, Diana Henry’s latest, Simple: Effortless Food, Big Flavors.

lilli-at-eric-carle-museum

The cookbook is outstanding, but with blurbs from Nigella Lawson and Yottam Ottolenghi, you don’t have to take my word for it. Henry seems like a pretty big deal in England: a weekly newspaper column, a broadcast on the BBC, and numerous awards, and I’m embarrassed to admit I’ve barely heard of her on this side of the ocean. Hopefully after this book she’ll become a household name, because it’s smashing.

img_20170301_180801_619

I’m posting these Persian-Inspired Eggs with Dates and Chili because it’s almost Purim and Mordechai, Esther, Achashverosh and Steve Bannon all live in Sushan, in the Kingdom of Persia. Diana says she first had a similar recipe in the Iranian food shop Persepolis in south London, served to her by the owner Sally Butcher. The café had it as a breakfast, but Diana added some greens and onions to it to make it into a more substantial lunch.

We had it for dinner last week when I felt pressed for time. I doubled the recipe and left out the chili, in hopes the girls would eat it. Bea had some, but Lilli was not keen on it. But the grown-ups loved it. It was easy to put together and just marvelous, even without the chili.

Persian-Inspired Eggs with Dates and Chili from Simple by Diana Henry

Ingredients

½ tablespoon olive oil

½ onion, finely sliced

½ teaspoon cumin seeds

¼ teaspoon chili flakes

Handful of baby spinach

2 large eggs, lightly beaten

Salt and pepper

2 soft dates (such as Medjool), pitted and coarsely chopped

1 tablespoon coarsely chopped cilantro leaves

Greek yogurt and flatbread (pita), to serve (optional)

Directions

Heat the olive oil in a small skillet and add the onion. Cook over medium heat until it is golden and soft. Add the cumin and chili flakes and cook for another 30 seconds or so, then add the spinach. Keep turning the leaves over in the heat so they wilt and the moisture that comes out of them evaporates, then reduce the heat and add the eggs, seasoning and dates.

Cook quite gently, just as you would if you were making creamy scrambled eggs; the mixture should be soft set. Finally scatter the cilantro. Serve immediately, with a little yogurt on the side (if you’ve made quite a spicy plateful you’ll need it) and flatbread, if you want.


Close Enough


20160320_131010

I am a bad food blogger. Let me explain. Purim’s coming up, and as I’m assembling costumes (including a fairy dress that “needs to have buttons up the back”), I realized that I never told you about last Purim, when I snuck away after Carnival for a blogger event. It was for cookbook author and chef Sara Moulton, and it was at Harvest in Harvard Square. Turns out she got her start there, so this was a very special afternoon for her. She collaborated with Harvest’s Executive Chef Tyler Kinett on a very special menu inspired her new cookbook Sara Moulton’s Home Cooking 101: How to Make Everything Taste Better. (Well, new at the time. Like I said, bad food blogger.)

We started with a delicious Spring Pea Soup that had smoked salmon, crispy potatoes and crème fraiche on top, which was inspired by the Pea Vichyssoise with Smoked Salmon in the cookbook. Dessert was La Tulipe’s Apricot Souffle, which she adapted from her time at Gourmet Magazine (z’l). Sara actually called up someone to help her with the demo, but when I saw that the prepared menu in front of me said there was soufflé for dessert and she was holding up a whisk, I knew there was going to be an insane amount of egg whites being whipped – by hand – and I kind of hid my head as to not be noticed for that task. Someone did raise their hand to help out. I think it was a fashion blogger who didn’t see it coming, but she did a wonderful job of whisking, for nearly 10 minutes straight.

20160320_140934


I’m embarrassed to say I don’t remember what my actual main course was. According to the menu I saved, we had “Steak & Eggs,” which was “Braised Short Ribs, Poached Egg and Broccoli Rabe & Butterball Potatoes,” inspired by “Red Wine-Braised Short Ribs of Beef” in the book. But because I write a “mostly vegetarian food blog”, they knew to make an alternate dish for me. I’m a bit mortified to admit I can’t remember what they subbed for it. But I promise you, the soup and soufflé were so good, what came in the middle doesn’t really matter.

What did matter from that event was that Sara was darling and kind and warm and lovely. She is bite-size, super small, and her Converse All-Stars gave her no extra height. I told her how much her nacho pie recipe is enjoyed in our house, and she appreciated the sentiment, or at least seemed to.

The afternoon ended with each one of us receiving a signed copy of the cookbook, and I’ve enjoyed cooking from it these past 11 months. The Beans and Greens Gratin is just about perfect for this time of year. As Sara explains: “When you see the word gratin in the title of a recipe, it means that the dish is topped with a light brown crust usually consisting of baked breadcrumbs or grated cheese. […] Here I’ve combined two hearty ingredients: beans and greens.” It employs one of her favorite tricks for thickening bean-centric dishes, which is mashing some of them. And it works! It’s very hardy, and travels well the next day for lunch leftovers.

20170118_183635

I did a “close enough” version of this recently. It calls for fresh breadcrumbs, but since I’m still waiting for my replacement blade for my recalled food processor, I had to use Panko that I had. (Any time now, Cuisinart…)  I didn’t have fresh rosemary in the house, so I skipped it, and it was fine.

The recipe also survived me using a slightly smaller can of beans and a larger can of tomatoes, which is what I had on hand. I used a spoonful of Better Than Bouillon in 1 ½ cups water in lieu of Sara’s Homemade Vegetable Stock. Like I said, close enough.

Beans and Greens Gratin from Sara Moulton’s Home Cooking 101: How to Make Everything Taste Better

 Start to Finish: 1 Hour 15 Minutes/Hands-On Time: 40 Minutes/Servings 6

 Ingredients

1 ¼ cups fresh breadcrumbs (made by pulsing 2 to 3 slices homemade-style white bread in a food processor)

3 Tablespoons extra-virgin olive oil, divided

½ teaspoon red pepper flakes

Kosher salt

1 cup finely chopped onion

1 Tablespoon finely minced garlic

2 Tablespoons fresh rosemary, finely chopped

4 cups packed coarsely chopped chard, kale, mustard greens, collard leaves or a mix (tough stems removed)

2 cups cooked pinto, white, kidney, or black beans, or chickpeas; or rinsed and drained canned beans (a 19-ounce can)

1 ½ cups Homemade Vegetable Stock or store-bought vegetable broth

1 ½ ounces freshly grated Parmigiano Reggiano

1 cup chopped whole canned tomatoes

Freshly ground pepper

Directions

Preheat the oven to 375F. Toss together the breadcrumbs, 1 tablespoon of the olive oil, the pepper flakes and salt to taste in a small bowl.

Heat the remaining 2 tablespoons oil in a large ovenproof skillet over medium heat. Add the onion and cook, stirring occasionally until golden, about 8 minutes. Add the garlic and rosemary and cook, stirring, 1 minute. Add the greens in batches and cook until they are wilted. Mash ½ cup of the beans with a potato masher or fork and add the mashed beans along with the whole beans, stock, cheese, tomatoes, and salt and pepper to taste. Sprinkle the crumbs evenly on top of the mixture. Bake on the upper middle shelf of the oven until the crumbs are lightly browned and the beans are bubbling, 25 to 35 minutes.


Snowstorms and Squash


20170101_115743

Oy, 2016. There were many moments I (we? Most everyone?) would like to forget, although I am happy that this year brought me back to Western Mass. The last week of the year, for me, at least, was really lovely. My girls and I all had off from our schools so we spent the entire week together. When Beatrix wasn’t watching Frozen (“Elsa! Elsa!”) we squeezed in a few adventures.

We explored Great Barrington in the Berkshires (only about an hour from here) in search of the best grilled cheese in the Northeast. We had fun at Forbes Library, whose cookbook and media collection continues to impress me. (More on those in upcoming posts.) We made it to two children’s museums, including a New Year’s Eve Jr. celebration that allowed Bea endless rides on the carousel.

20161231_152314

One of Rich’s brothers gave us a gift card for Marshall’s/TJ Maxx/Home Goods for Christmas, and Lilli was quite pleased to find both dinosaur pasta and a cookie and cupcake decorating kit in the “Home” section. The design kit came in very handy during last week’s snowstorms, again between Frozen screenings.

20161229_171027

That decorating kit also brings us to today’s recipe. Because one cannot decorate cupcakes without frosting, and the only frosting worth making involves cream cheese. Which means I had cream cheese in the house, and that was the one ingredient I was missing to make this twice-baked butternut squash.

I knew it was a keeper as soon as I saw it, and, given its cheesiness, it was a good addition to our Chanukah table. I served it next to potato latkes, a salad of butter lettuce, dates, slivered red onion (soaked in ice cold water to take the snap out), sprinkles of blue cheese and a balsamic brown sugar dressing. Now that I think about it, there was also a lentil stew with rutabaga and kale to start things off.

20161230_170034

Grandparents, don’t panic. She got a haircut soon after this photo was taken.

The recipe actually calls for the squash to first get a steam in the microwave, so it moves the process along a bit quicker than if you did everything in the oven. Ditto with the sweet potatoes, which I know you can do in a microwave, as my old co-worker reminded me every day. I don’t own a 9×13 microwavable dish, so I used a glass pie pan and the squash ends hung over the sides. It still worked. I then transferred the squash halves to a large baking sheet.

This is not an everyday recipe, although it’s not as rich as the stuffed pumpkin that makes me giddy. I hope you’ll give it a shot. It’s actually very simple to make and tastes even better than you think it will.

20161229_183115

Learn from my mistakes. Don’t use parchment paper to bake and broil. It burns after a certain point.

Twice-Baked Butternut Squash from “Real Simple” December 2016

Ingredients

1 (3- to 3 ½-pound) butternut squash

¼ cup water

2 (8- to 9-ounce) sweet potatoes

3 ounces cream cheese, softened

5 tablespoons unsalted butter, melted

1½ teaspoons table salt

¾ teaspoon freshly grated nutmeg

½ teaspoon black pepper

3 tablespoons shredded sharp Cheddar cheese

3 tablespoons grated fresh Parmesan cheese

1 tablespoon minced fresh chives (optional – I skipped it.)

Directions

Preheat oven to 375°F.

Cut squash in half lengthwise. Remove and discard seeds. Place squash halves, cut sides down, in a microwave-safe 13- x 9-inch baking dish and add ¼ cup water. Cover dish with plastic wrap and pierce 3 to 4 times with a knife. Microwave on HIGH 10 minutes. Carefully drain water out of dish. Turn squash halves over, and bake in preheated oven until tender, 35 to 40 minutes. Let stand about 5 minutes. Scoop flesh from squash, leaving a ¼-inch-thick shell and transfer to a medium bowl; reserve shells and return to baking dish.

Poke the sweet potatoes with a fork several times then microwave them on HIGH until tender, 6 to 8 minutes. Let stand until cool enough to handle, about 5 minutes. Peel potatoes and add flesh to bowl with squash along with cream cheese, butter, salt, nutmeg, and pepper; mash with a potato masher or a fork until mostly smooth.

Preheat broiler with oven rack 6 inches from heat. Scoop squash mixture into reserved squash shells and top with cheddar and Parmesan. Broil until golden brown, about 3 minutes. Sprinkle with chives.


Enjoy Every Bite

Despite my best efforts — and believe me, I have tried — Lilli basically lives on yogurt, cereal, plain starch (rice, rice cakes, barley, farro, pasta), grilled cheese, fish sticks and granola bars. As someone who prides themselves on serving whole foods made from scratch, meal times can be… well, is “despair” too dramatic a word?

img_20161208_180409262

Sometimes, if I’m lucky, she’ll enjoy a few pieces of avocado and maybe a few blueberries. We’re a far cry from where she was before she turned two, when she would gobble up mushrooms, roasted broccoli, and all sorts of fruits.

On the other hand, there’s Beatrix, who is like old school Lilli taken to another level. She seriously enjoys food. Daycare has remarked on it. My mother would watch with wonder all summer long as Beatrix would dig into the fresh asparagus, enjoy every kernel on her corn cob, and delight in basically everything that was put in front of her. “It’s a pleasure to watch her eat,” Mom would say.

20161212_183050

Being a toddler, she’s also incredibly impatient. So if we weren’t fast enough, she would shriek and slam her little fists down on the table. My mother actually started calling her “Elizabeth,” as in Elizabeth Taylor, because she was a beautiful drama queen who couldn’t get the food in her face fast enough. “Calm down, Elizabeth, the {brisket, chicken, pasta, meatballs, fish, rice, eggs, fresh vegetables} has to cool down first.” (This was inspired by a particularly mean Joan Rivers joke in which she called Ms. Taylor the only woman in the world who would scream “faster!” at a microwave. Z”l, Joan.) Someone started calling her “the little piglet,” although I want to be very careful about this, because the last thing I want to do is give my daughter an eating complex. Enjoy every bite, little one, I say. Food is delicious.

The biggest threat to Bea’s appetite is her older sister’s influence. Every few days, when Lilli will do her evening ritual of completely rejecting a meal (and ask for a bowl of yogurt or cereal two hours later) Bea will catch on and abandon her plate as well. So when I saw this recipe for homemade fish sticks in Taste of Home’s 100 Family Meals I was sent, I crossed my fingers and went to the kitchen.

20160715_183805

The idea behind this cookbook is to get families to sit down together a few nights a week for dinner. If you do it twice a week, you’ll end up with 100 meals at the end of the year. This recipe was marked as “Eat Smart” and “Fast Fix”, looked super simple to make, and much healthier than the frozen fish sticks I’m loathe to serve the girls. I had everything in the kitchen, including some frozen tilapia from Costco, which I set to defrost in the fridge on a plate covered with Stretch-Tite the night before.

I actually skipped the two tablespoons of garlic herb seasoning blend the recipe called for, first because I had no such thing in the house, and second because I could almost hear Lilli’s stock protest (“It’s too spicy!”) in my head as I was reading the recipe. I don’t have cooking spray in the house, so I put my finger over the olive oil and drizzled that on top of the fish sticks.

And how were they? They were great! Rich and I enjoyed every bite, with homemade tartar sauce (at his insistence), and a side of red cabbage slaw with dried cranberries and fresh slices of mandarin oranges. But alas, Lilli flat out rejected them, and Bea took a bite, and then followed her big sister into the living room to join her in watching some Youtube garbage.

20161208_182303

Regardless, these are going into the rotation and will be served instead of the frozen ones from the store. I will not be deterred! They really are a great weeknight meal. I think if I serve these to Bea without her sister being there, she will devour them all, then slam her tiny hands into the table demanding more!

Parmesan Fish Sticks from Taste of Home’s 100 Family Meals: Bring the Family Back to the Dinner Table

Ingredients

1/3 cup all-purpose flour

½ tsp. salt

1/8 to ¼ tsp. pepper

2 large eggs

1 cup panko bread crumbs

1/3 cup grated Parmesan cheese

2 Tbsp. garlic-herb seasoning blend (Optional)

 1 lb. tilapia fillets

Cooking spray

Directions

Preheat oven to 450F.

In a shallow bowl, mix flour, salt and pepper. In another bowl, whisk eggs. In a third bowl, toss bread crumbs with cheese and seasoning blend.

Cut filets into 1-inch-wide strips. Dip fish in flour mixture to coat both sides; shake off excess. Dip in eggs, then in crumb mixture, patting to help coating adhere.

Place on a foil-lined baking sheet coated with cooking spray. Spritz tops with the spray until crumbs appear moistened; or, drizzle with olive oil for the same effect.

Bake 10-12 minutes or until golden brown and fish begins to flake easily with a fork.