We May Never Know

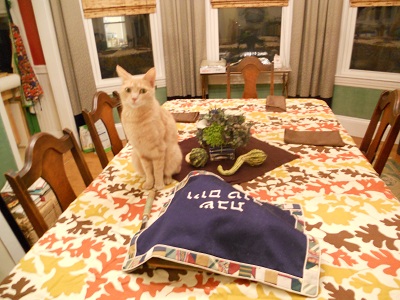
I’m not sure why my Food & Wine ran a recipe for Escarole with Pickled Butternut Squash back in July. Of course, I only had a chance to read the magazine this past September, but I made a mental note to make the salad once the produce became available. (For the record, I am current with my Ladies Home Journal subscription; how to pose my cat for optimal cuteness? Tell me more!) So when a butternut squash, so large it towered over my cat came in the CSA last week, I thought it was time to make the salad.

Lilli at Honk!

But I still had to find the escarole. I walked to the Copley’s Farmers’ Market during my lunch break last Friday and chatted about the recipe with every farmer there. “I’m not sure why the magazine printed this recipe in July,” I would say to each as I explained my search for escarole. The last farmer scoffed, “You’re not sure why they printed the recipe in July? Well, I’m not sure why they’d write a recipe with produce that doesn’t grow at the same time!” It turns out the escarole will come once the butternut squash have all been roasted and eaten.

Deterred but not defeated, I regrouped. I still desperately wanted to make this salad. And then it occurred to me, why not use the arugula that came in the CSA alongside the butternut squash? The peppery bite of the dark lettuce would be strong like the escarole. Although I was still a little concerned about how the creamy dressing would cling to the sharp leaves, I pressed onward.

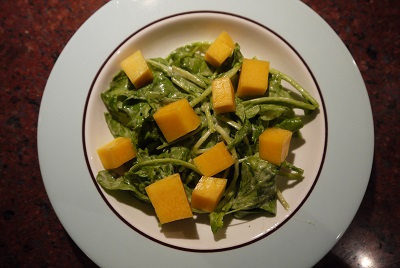
pickled squash and arugula

Well, it turns out that arugula makes a great substitute. Apparently this recipe is from all-star chef Gabriel Rucker, featured in the magazine in 2007. Sounds like a reservation at his Portland, Oregon restaurant Le Pigeon is the toughest one in town to make, but not as hard it is to find escarole at a farmers’ market in October, since that is apparently impossible.

It’s a quick pickle for the squash, and I loved the crunch and twang against the creamy, herbal dressing. For the arugula, I soaked the quarter pound that came in the CSA in three rounds of cold water. I used a quarter pound because that’s what I had on hand. For the record, I think the dressing would spread well with a half-pound of arugula, so let’s call that two bunches. I also pickled a cup’s worth of squash, rather than the half-cup the original recipe called for.  Just to have for munching.

Arugula with Pickled Butternut Squash

Ingredients

1 ¼ cups apple cider vinegar

2 Tablespoons sugar

1 Tablespoon kosher salt, plus more for seasoning

6 ounces butternut squash, peeled and cut into ¼-inch dice (1 cup)

3 Tablespoons mayonnaise

1 Tablespoon freshly grated Parmigiano-Reggiano cheese

6 large sage leaves

1 garlic clove

1 teaspoon freshly squeezed lemon juice (I just used a half a lemon)

1/3 cup canola oil

Freshly ground pepper

½ pound arugula

Directions

In a medium saucepan, combine 1 cup of the apple cider vinegar with the sugar, 1 tablespoon of kosher salt and ¼ cup of water and bring to boil. Add the diced squash and let cool to room temperature. Drain the squash (I did this once my dressing and lettuce was ready and let the squash pickle a little bit longer.)

Meanwhile, in a food processor, combine the mayonnaise with the cheese, sage, garlic, lemon juice and the remaining ¼ cup of vinegar. With the machine on, drizzle in the oil until the dressing is emulsified. Season with salt and pepper. q

In a large bowl, toss the arugula with the sage dressing. Arrange the greens on plates, top with the pickled squash and serve.

Make Ahead: The pickled squash and garlicky sage dressing can be refrigerated for up to 2 days.

The Luckiest

My cousin Mark, who is best described as tall, dark, handsome and phenomenally successful, is also the world’s luckiest vegan. I say this based solely on the fact that his mother, Aunt Sydney, is the best cook I know, and she makes sure that his belly is always happy and full when he’s home for a visit. Whether it’s a bowl of fluffy quinoa tabouli for Pesach, or a jar of pickled beets, he is always well-sated.

Aunt Sydney lives only a few blocks from my parents, so when we are all home for the holidays, like we were a few weeks back for Rosh Hashana, the cousins, nieces, nephews, spouses and grandchildren all gather at Sydney’s for an afternoon visit. We try to catch up as best we can. Sometimes there’s plum cake; this year there was stellar mandelbroit. The visit always begins with Sydney asking what Mom served, and us clamoring for her menu.

I actually didn’t hear the full details of her menu on this last visit (I was distracted by the mandelbroit – it was that good), but Miriam, Syl’s wife, reported back to me about one of the vegan dishes she’d served. I honest-to-goodness gasped when I heard about the pan of butternut squash, leeks, sage and grapes, and may have even started to moan when I began to imagine what it must have tasted like. It sounded like pure autumn to me, a perfect harvest dish, which meant that it would be on my Sukkot table.

Sukkot is one of the three Jewish pilgrimage holidays, Pesach and Shavuot being the other two. Like Pesach, it starts with festive holy days (praying, eating, no work), has interim days (more praying, but back to work), and ends with some more holy days. (At some point I’ll write about my favorite holiday of all, Simchat Torah, but one thing at a time.)

Sukkot means, roughly, Feast of Booths, because the Children of Israel were commanded to spend the days of the holiday eating all their meals in a temporary structure, called a sukkah, to remind us of the 40 years in the desert. (Some people also sleep in their sukkahs, although I’ve never done it.) We also have some rituals involving a lulav (a palm branch) and an etrog (a citron), with a few pieces of myrtle and willow leaves tucked in between.

Sorry to bore you with the details, but it’s a really wonderful holiday for the whole family. A definite highlight of being a little kid is making colorful paper chain rings to string throughout the sukkah. We always had a sukkah growing up, and my parents have kindly offered their sukkah to me and Rich. We borrowed someone’s station wagon over Rosh Hashana to bring it back to Boston, but it turns out we’ll need to rent a truck to do it. Someday…

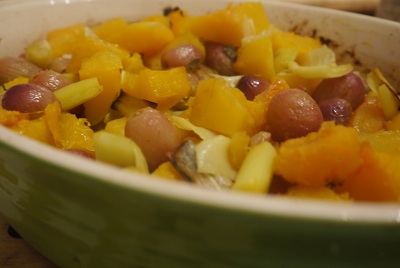
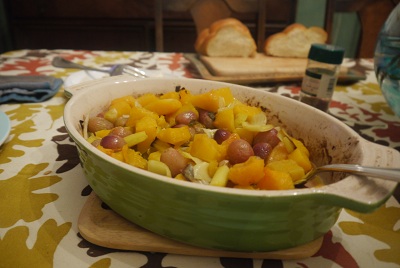
But yes, Sukkot is a harvest holiday, and nearly everything in this dish came in last week’s CSA. When Rich saw me take the dish out of the oven, he made two observations: that it looked like fruit salad at first glance, and that it looked like a Thanksgiving dish to him. Yup, I said, that’s exactly right. It is a Thanksgiving dish.

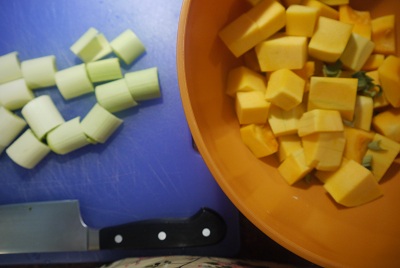
Aunt Sydney didn’t actually give me a recipe for this dish, but I guessed it in the same way that I guessed how to make her sweet potato and cilantro soup. I’ve taken to waking up earlier than Rich on the weekends, so I had actually cleaned the butternut squash earlier in the day making this a pretty quick dish to put together. Using a sturdy peeler, I simply peeled the squash, cut it in a half at its waistline, sliced those pieces in thirds, scraped out the seeds from its bulb, then cut those into thirds, or approximately two inch cubes.

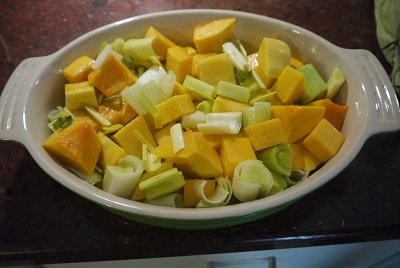
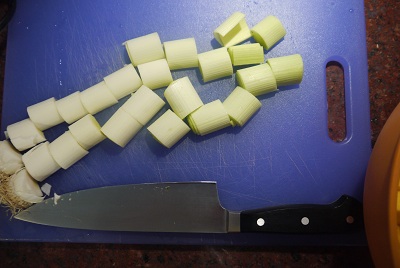
For the leek, I chopped off the top, peeled away its stiff, dark green outer layers until I got to very pale green part, sliced the leek in half vertically, and ran the stalks under running water and wiped out any dirt stuck in its crevices. To make certain that the leeks wouldn’t burn in a hot oven, I kept those pieces and their layers altogether in rather large pieces, about 2 inches. I intentionally photographed the pieces of leeks so you could see for yourself.

Roasted Butternut Squash with Leeks, Grapes and Sage

Ingredients

1 butternut squash, peeled, seeded and cubed into 2-inch pieces

1 leek, halved, cleaned and sliced into 2-inch pieces

2 sage leaves, sliced into a thin chiffonade

1 cup red grapes, rinsed

2 tablespoons olive oil

Pinch of kosher salt

Directions

Preheat oven to 450. If you didn’t wake up earlier in the day to clean a butternut squash, my advice is to preheat the oven before you prep any of the vegetables.

In a large bowl, toss together the squash, leek, sage, olive oil and salt. Place all ingredients into a roasting pan with sides or medium-sized casserole dish, and cover tightly with foil. Place into the hot oven for approximately 30 minute. At the end of 30 minutes, remove the foil, and give everything a stir. Things should have softened very nicely by now. Remove the pan from the oven and add the washed grapes and give everything a stir. Place the casserole dish, uncovered, back into the oven for approximately 15 minutes more. Your goal at this point is to soften the grapes. In 15 minutes time, check on the pan. If everything is softened, and perhaps a little bit browned, remove from the oven, and serve.

Scone Cold Morning

I’ve always thought of herbs as seasonal. Basil and mint are summer herbs, while rosemary and sage are more wintery. Of course, the sage bush in front of my house, which flourishes in the summer sun, upends my theory. Many summer nights I would run from my kitchen, apron still tied around my waist, to pluck a few leaves off for dishes like sautéed cabbage and white bean dip.

Nonetheless, the sage bush was still hanging on well into January. There were still some thin, curled leaves clinging to life until last week. But with snow forecast, I knew that would be the last of my sage until late spring. I grabbed the last remaining leaves on Thursday night and stowed them away in the fridge.

I wanted those last leaves to have a fitting, wintery use, and this morning we made scones with them: walnut and sage scones with a brown butter maple glaze, to be exact. This recipe was the runner up in a Food52 contest for best use of sage and walnuts. To be honest, this recipe appealed to me more than the winner, a pumpkin rugelach with sage and walnut. (Pumpkin-flavored rugelach? If you’ve ever had Gus and Paul’s version of the cookie you’d most likely agree that squash is not necessary.)

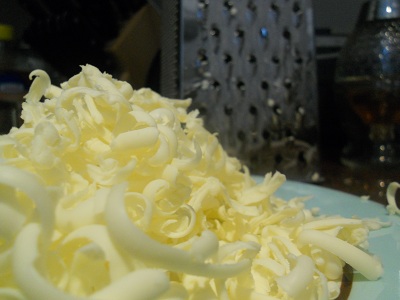
I must confess that Rich helped me a great deal with the baking this morning: My herniated disc has been slowing my kitchen production to an almost stand-still. Rich had the wise idea to make eight scones instead of the four the recipe suggested. A mini version of the cookie proved much less of an irritant to my reflux. Although the original recipe calls for full fat Greek yogurt, we used a low-fat version, something that I now keep in the house as a mild snack for me. And we loved the grated frozen butter tip; we will definitely be utilizing that trick in other baked goods.

The scones were glorious, rich and extraordinarily delicious. A wonderful way to begin a Sunday morning.

And one last thing: If you could ask four questions of the Boston Globe‘s advice columnist, Meredith Goldstein, what would they be? Here are my four questions.

Walnut and Sage Scones with Brown Butter Maple Glaze, from Food52.com

Makes 4 normal-sized scones, or 8 mini-scones

Scone Ingredients
1 stick frozen butter, of which you will use 4 Tbs.
1/2 cup toasted walnuts
1/4 cup milk
1/4 cup Greek yogurt
1/2 cup all-purpose flour

scant 1/8 cup sugar (2 Tbs.)
1 tsp. baking powder
1/4 tsp. salt
1 teaspoon sage, minced or more to your taste

Brown Butter Maple Glaze Ingredients
1 Tbs. butter
1/8 cup maple syrup (which I find at a deep discount at Ocean State Job Lot)
1/3 cup confectioner’s sugar
1 Tbs. milk or cream, use enough to slightly thin the glaze

Directions
1. Heat oven to 425 degrees
2. Grate 4 Tbs. of butter and place in freezer until ready to use
3. Whisk milk and yogurt together, set aside. (If your kitchen is warm, place in fridge until needed.)
4. Mix together flours, sugar, baking powder, baking soda, salt and sage. Add frozen grated butter and toss until butter is well-coated. Gently stir in milk mixture with a spatula just to combine.
5. Place onto floured bench and knead a few times until it comes together. Gently press into a 1/4″ thick square, then fold up long sides in thirds (like folding a letter) then fold up short sides until you have a small tall square. Place in freezer for five minutes on a floured plate.
6. Place on floured bench and gently fold or roll into 1/4″ thick square. Place enough walnuts to generously cover the surface, then press walnuts into the dough so they stick. Gently roll dough into a log. With seam facing down, press into rectangle — it will be about 6×4 and an inch thick. Using floured knife, cut in half then cut each half into triangles.
7. Place on silicone lined (or parchment paper) baking sheet. Bake 18 — 20 minutes until browned. Let cool.

8. Make the glaze: Melt butter in small saucepan and lightly brown, add maple syrup. It will bubble vigorously. Once bubbles have subsided, whisk in confectioner’s sugar, add enough milk or cream to thin glaze slight (until it looks ‘spreadable’). Drizzle or brush over scones. *Note: If you end up with a thick glaze, just spread on with a spatula and call it icing, no one will be the wiser.

Twists of Fate

It feels like I moved to Boston a million years ago, but it was actually the fall of 2004. Gas was $2 a gallon, the Red Sox hadn’t won a World Series since before women had the right to vote, and not many people knew what a levee was.

I had moved to town to write for a small Jewish newspaper. Which one makes no difference, really, but like so many things in life, I credit fate, some sort of divine plan that brought me here: My mom’s best friend sat next to a distant cousin at a family bar mitzvah. The long-last relative, Richard, was the editor of said Jewish newspaper, and he was on the search for a new writer. Less than two months later, Richard had hired me. I signed a lease, bought a T-pass and was on my way.

We were a small staff, but managed to create a 40-page paper every week. I averaged nine stories an issue. Richard quickly recognized our strengths and weaknesses, and knowing passion always creates a better product, I was lucky enough to interview such famous Jews as Joan Nathan, Susie Fishbein and… Joe Lieberman. (One of these things is not like the others…)

My fellow writers had their own passions: Shira focused on religion and politics, and Penny focused on education and parenting. We were a team. Richard was our coach, creating the roster and calling plays. “Frame a story,” he would tell me as he created a box with his arms at 90 degree angles.

A million years later – or, this past weekend – Richard gathered his team for a reunion potluck. We drove down to Rhode Island listening to the end of another lackluster Patriots’ game. The Pats failed to blow out their opponent, our car managed to blow out a tire on Route 95. Undeterred, we finally made it to our destination, albeit an hour late.

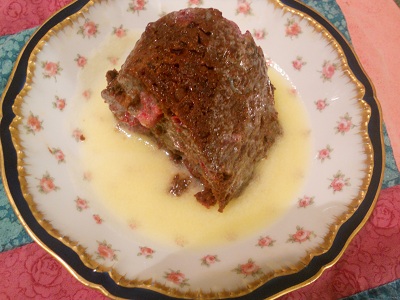
Richard had made big pot of winter borscht, with large chunks of root vegetables and cabbage that floated in a ruby broth. There was a salad full of fruits – pomegranate, kiwi, apple and citrus – thick bread and a bean salad. I brought this sweet potato gratin as a side and a cranberry molasses pudding (think Charles Dickens-type pudding) with a hard sauce for dessert.

going...

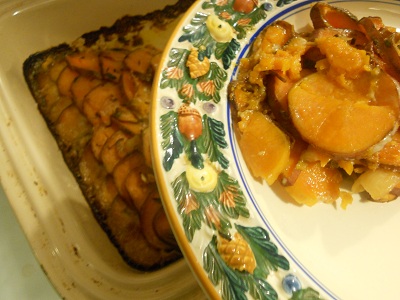
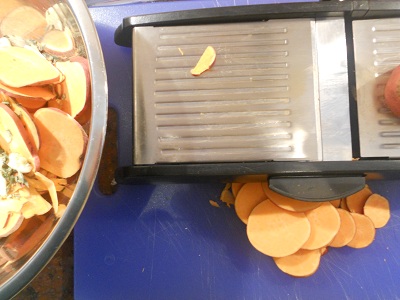
My gratin was a mere twist of fate – our friends Will and Gabi bequeathed their CSA last week to us, and I dug the recipe from that accidental Ottolenghi cookbook that’s turned into a tidy box full of tricks. Even trickier math was involved than last time, as I had one third less sweet potatoes the recipe, written in grams, called for. I had the heavy cream in the house because it was on sale a few weeks ago and thought that the need for heavy cream would reveal itself soon, what with all the holiday parties we were scheduled to attend.

The recipe calls for a medium-sized pan for the gratin, and I found that my medium-sized lasagna pan was perfect for the tightly-packed orange coins. I used both sage and thyme because I had both on hand; I wouldn’t worry too much about it if you only have one of the herbs. I would strongly advocate using a mandolin for this project.

going...

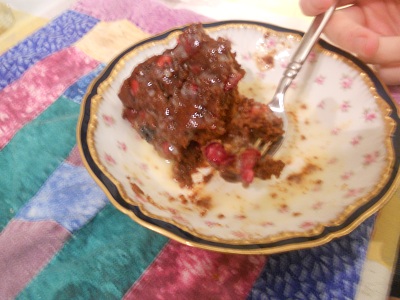
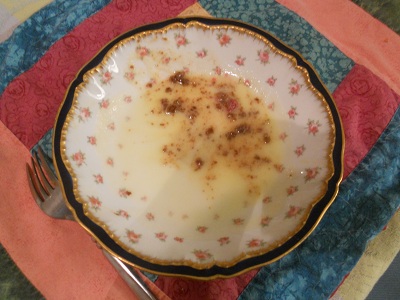
The pudding was even more unexpected: I was trying to come up with something for the remaining two cups of cranberries that hadn’t been strung on our tree, and I’d dug up a jar of molasses in the pantry during my clean-up a few weeks prior. I’d never steamed a cake before, and I did have to ask myself several times if I was doing it correctly. It turns out I did, although my bundt pan was a little tilted and the cake looked like it had a club foot. Don’t skip the cholesterol-laden hard sauce. It really makes the dish. I had hoped to use some more of the on-sale heavy cream for the sauce, but I opened Richard’s fridge and he magically had the half-and-half the recipe called for. Richard took out his family china for our fancy dessert. Couldn’t have planned that one better if I’d tried.

gone.

Danielle Postma’s Sweet Potato Gratin from Ottolenghi The Cookbook

This dish is simple but effective, due to the way the potatoes are arranged in the baking dish. You can prepare everything a day in advance and have it ready in the fridge to just pop in the oven. The sage can be replaced with thyme, or you could use both. Make sure you choose orange-fleshed sweet potatoes (as opposed to the paler variety).

Serves 4 – 6

Ingredients

6 medium sweet potatoes (about 1.5kg in total, about 3 lbs.)

5 Tablespoons roughly chopped sage, plus extra to garnish

6 garlic cloves, crushed

2 tsp. coarse sea salt

½ tsp. freshly ground black pepper

250 ml whipping cream (About 8 oz. or 1 cup)

Directions

  1. Preheat the oven to 200C/Gas Mark 6 (400 F). Wash the sweet potatoes (do not peel them) and cut them into discs 5mm thick. A mandolin is best for this job but you could use a sharp knife.
  2. In a bowl, mix together the sweet potatoes, sage, garlic, salt and pepper. Arrange the slices of sweet potato in a deep, medium-sized ovenproof dish by taking tight packs of them and standing them up next to each other. They should fit together quite tightly so you get parallel lines of sweet potato slices (skins showing) along the length or width of the dish. Throw any remaining bits of garlic or sage from the bowl over the potatoes. Cover the dish with foil, place in the oven and roast for 45 minutes. Remove the foil and pour the cream evenly over the potatoes. Roast, uncovered, for a further 25 minutes. The cream should have thickened by now. Stick a sharp knife in different places in the dish to make sure the potatoes are cooked. They should be totally soft.
  3. Serve immediately, garnished with sage, or leave to cool down. In any case, bringing the potatoes to the table in the baking dish, after scraping the outside clean, will make a strong impact.

Cranberry-Molasses Pudding with Vanilla Hard Sauce from “CottageGourmet” on Food52

Ingredients

1egg, lightly beaten

1 Tablespoon sugar (a heaping Tablespoon)

1/2 cup molasses

1/3 cup hot water

1 1/2 cup flour

2 teaspoons baking soda

1/2 teaspoon salt

2 cups fresh cranberries, picked over, washed and drained

1 cup half and half

1 stick unsalted butter

1 cup sugar

1/4 teaspoon salt

1 teaspoon vanilla extract

Directions

  1. Gently fold together all of the ingredients through the cranberries in the order listed. Pour into a greased mold (I used a Bundt pan), and tightly wrap with several layers of foil so no water sneaks into the pudding.
  2. Put a steamer basket in a large pot and fill the pot with an inch or so of water. Bring to a boil, then lower the heat so the water is barely simmering. Rest the pudding on top of the steamer basket and cover the pot snugly with a lid. Steam without uncovering the pot for 1 to 1 1/4 hours, until the pudding is cooked through but not totally dry. (A cake tester should come out sticky, but not wet.)
  3. To make the sauce: combine the half-and-half, butter, sugar and salt in a saucepan. Cook over medium heat, stirring occasionally, until the sugar and butter are melted and the sauce is smooth. Remove from the heat and stir in the vanilla. Serve the sauce warm over the warm pudding.

Sophomore Slump

One hundred posts in, and I’m still making the same rookie mistake: I haven’t yet learned I need to photograph all my cooking and baking projects, and not just ones I aim to post on this here blog. And what’s even sillier on my part is the fact that I’ll sometimes be dining with other people who do photograph everything they’re about consume, like my friend Rachel who took some really beautiful photographs of every dish of our dinner on Saturday night. (Quick review: extremely affordable, very tasty, and terrible service. I’ll probably be back.)

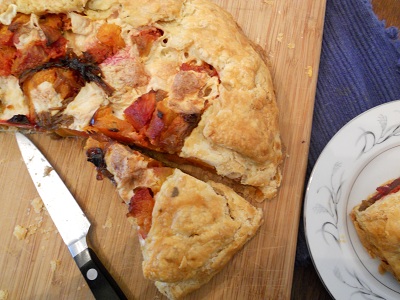
I think I’ve just committed the most egregious example of this mistake with this savory tart filled with roasted vegetables, caramelized onions and smoked mozzarella. I had no plans to make this, nor blog about it. Nope, had no dreams about how well the sweetness of the onions would bounce off the smoky cheese that had melted in between the layers autumn vegetables that had been wrapped in a savory, flakey crust. Nope, not a thought.
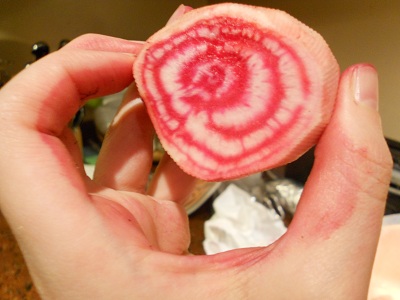
What I had planned on taking a picture of was the butternut squash. Not because I wanted to do anything with it for the blog, but because I wanted to document its size. It was the largest squash I’d ever seen — my guess is one and a half feet high and about 15 pounds. It was roughly as tall as my cat, but clearly outweighed him by five or so pounds. I had wanted to photograph the cat standing next to the squash, but I totally forgot to do it until I had cut off the top of the squash on Sunday night in order to whip together some butternut squash risotto. After I had cleaned and cubed the chunk of squash – there is still a chunk of squash in the fridge that hasn’t been touched, about the size of a regular butternut squash – I realized I had way too much squash on hand. So I decided to roast the leftover squash, and while I was at it, I might as well toss in some other roots I had hanging around my crisper. So out came some beets, a few carrots, and a handful of red potatoes from the cupboard. I did call Rich in at one point to take a photo of the striped Chioggia beet because I was so taken by its beauty. Can you believe this came out of dirt? I asked him.
So I peeled and cubed my root veggies, tossed them altogether in a bowl with a few glugs of olive oil and a healthy pinch (make that two pinches) of salt, and dumped it all in a large lasagna pan. I decided at the last minute to lay down a few sprigs of thyme on top. My goodness, I said to myself, all those colors, it’s as pretty as a picture.  I then covered it with foil, and tossed the pan into a 400 degree oven. I know, ridiculous, right? To see it, say it, and then do nothing about it. So silly!
About 20 minutes in, I checked the veggies, gave them a stir, and then 25 minutes after that, I removed the foil, gave everything a stir, turned the oven down to 350, and baked them for about 15 minutes more. I then removed the pan from the oven, admired how all the pinks and oranges looked like a sunset, and then taste-tested a few of the different veggies to make sure they had all softened sufficiently. Once they cooled, I moved them to some Tupperware and put them in the fridge.
This next part is something that I often grapple with on this blog: using ingredients that aren’t exactly inexpensive. Last week I was poking around the cheese case at the market around the block when I stumbled upon a very nice hunk of smoked mozzarella. It was some sort of Manager’s Special that day, and was discounted $3. I bought the cheese – I mean, wouldn’t you? – but figured I wouldn’t mention it on the blog because I couldn’t very well go and expect people to go and buy a pricey bit of cheese for something, even though I bought it at a discount.
So, I was sitting at my desk at work thinking about my ball of cheese and my roasted vegetables when it occurred to me that those two things might taste very good together. But I didn’t want to mash them into a sort of hash and put them in a pie dish and melt the cheese on top. And that’s when it dawned on me: this would be the perfect opportunity to try out a savory version of Jacques Pepin’s apple galette with some fresh herbs added to the dough. And, I asked myself, wouldn’t the tart be so much better if some caramelized onions were involved?
And that’s when I kicked myself for not photographing my roasted root veggie prep. I did not know any of it was going to end up on Cheap Beets, but now it has, if but with a truncated version of the photography. Sure, some of you might take note that this is the third version of some sort of rustic tart on my blog – in a row, no less. Some of you might even call it cheating. But I don’t think you’ll really mind.
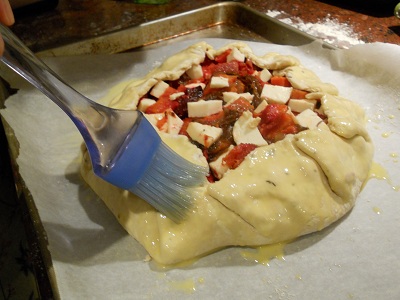
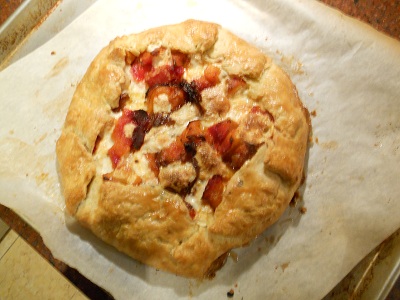
Rustic Roasted Root Vegetable Tart with Caramelized Onions and Smoked Mozzarella.

This is four separate recipes in one, just as the roasted pear and cranberry crostata was. I followed my own advice this time and made each part on a different night. Of course, I hadn’t actually planned it that way, but tarts really are what happen to you while you’re busy making other plans.

Part One: Roast approximately three cups of root vegetables – I suggest butternut squash, beets, carrots and potatoes – according to the description above.

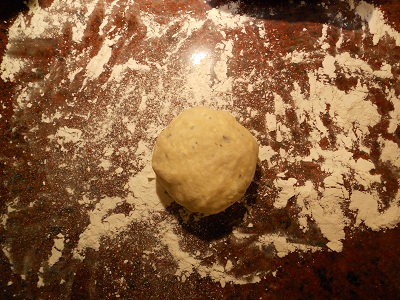
Part Two: Make the savory crust

Crust Ingredients

1½ cups all-purpose flour

½ teaspoon salt

1 stick plus 2 tablespoons cold unsalted butter, cut into small pieces

1/3 cup ice water

1 teaspoon fresh sage, ripped into small pieces

1 teaspoon fresh thyme

Directions

In a food processor, combine the flour with the salt, butter and fresh herbs and process for about 5 seconds. Sprinkle the ice water over the flour mixture and process until the pastry just begins to come together, about 10 seconds; you should still be able to see small pieces of butter in it. Transfer the pastry to a work surface, gather it together and pat into a disk. Wrap the pastry in plastic or wax paper and refrigerate until chilled. (You can also roll out the pastry and use it right away.)

Part Three: Caramelizing the onions

Ingredients

3 red onions, cut in half, laid flat, then sliced into ¼ inch thick half moons

Olive oil

Salt

Directions

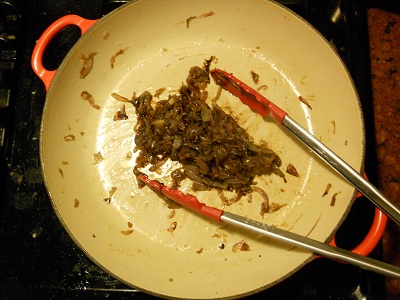
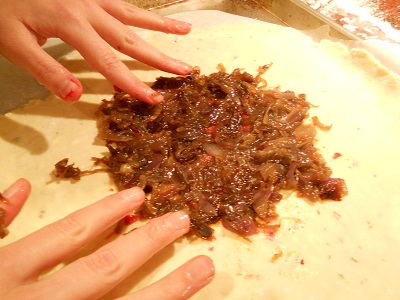
Place the onions in a deep 4-quart saucepan and drizzle and toss with olive oil to coat, about ¼ cup. Set over medium heat and, shimmying the pan occasionally, cook until the onions are slightly golden on the edges. Stir occasionally – it might take as long as 25 minutes of slow, slow cooking — then stir in a few pinches of salt. Stew, stirring occasionally, until the onions are amber colored and tender but not mushy, another 20 minutes or so. If at any point the onions look as if they may dry out, cover them to trap some of the moisture in the pan. Taste for salt. You should get about 1 cup cooked onions.

Part Four: Assembling the Tart

All of the previous ingredients can be made beforehand and refrigerated for approximately three days.

Ingredients

¾ cup smoked mozzarella, cut into ½ inch pieces

Savory dough

Caramelized onions

Roasted root vegetables

1 egg, lightly beaten

Directions

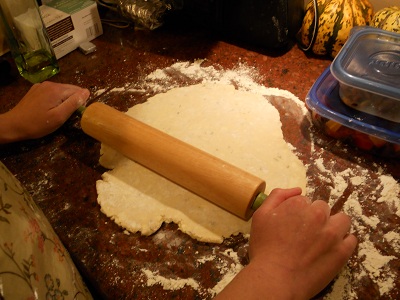
Preheat the oven to 400°. On a lightly floured work surface, roll out the pastry to a circle and transfer to a large rimmed baking sheet.

In the center of the pastry, lay out all but one quarter of the caramelized onions.

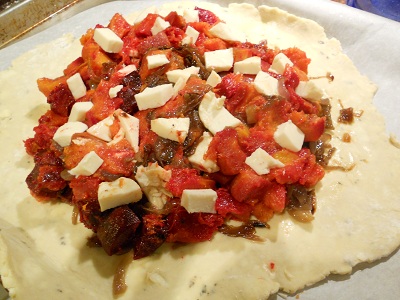
Lay two thirds of the mozzarella on top of the onions.

Using a spoon, gently place all of the root veggies on top of the cheese.

Distribute the remaining onions and pieces of cheese on top of the vegetables.

Fold the pastry edge up and over the vegetables to create a 2-inch border.

Brush the folds of the crust with the beaten egg.

Bake the tart for about 1 hour, until the pastry is nicely browned and crisp. Transfer the pan to a rack and let the tart cool. Serve warm or at room temperature.

Off The Chain

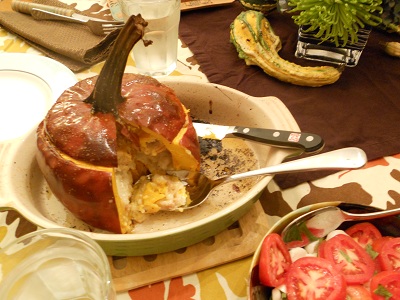
In July, as I was savoring peaches whose juices dripped down my wrist and fresh corn on the cob that required a good flossing after munching, I started wishing it was October. It was in July that I found a recipe in Melissa Clark’s In the Kitchen with A Good Appetitefor a pumpkin whose empty shell had been thoughtfully stuffed with alternating layers of toasted baguette, Gruyère, and a sauce of heavy cream and white wine steeped with sage and nutmeg. “I found this recipe,” I would say to Rich, my sister, friends, the cat – really, anyone in ear shot — “that is going to be off the chain. Off. The. Chain.”

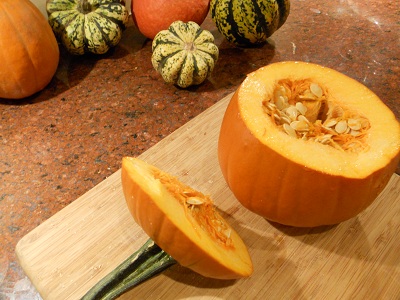
Well, it’s finally October, which means some of the best foods of the whole year – butternut squash, beets, arugula, cauliflower and, wait for it, pumpkins – have started to appear at markets and in CSA boxes around town.  Two weeks ago, my weekly CSA list noted an inclusion of a sugar pumpkin, which meant I was this close to fulfilling my stuffed pumpkin dream.

When I arrived at the student union for my usual Thursday pick up, there was a new girl checking off names. It was obvious there was no pumpkin in my box, and, even more frustrating, there was an enormous pile of sugar pumpkins on display right next to her. Rather than putting her on the spot, I thanked her for my pumpkinless box and brought it back to my office. Naturally, the only thing to do was call the farm and see how I could go about getting my rightful pumpkin at the next week’s pickup. They were totally cool about it; apparently I was the only person who either did not get their promised pumpkin – or who was crazy enough to actually call them about it. “There’s a pumpkin shortage this year!” I tried to explain to Rich.

Well, this week I received my promised pumpkin, as well as a new pumpkin in my box. So now, I can either make this dish twice, or use the second one for a terrific pumpkin pudding recipe I stumbled upon last year around this time.

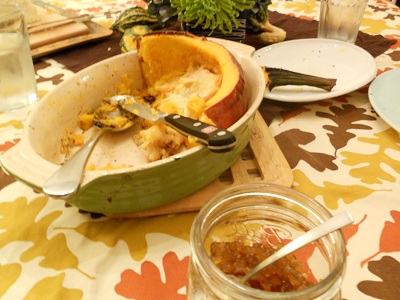
Friday night we finally had the pumpkin of my dreams. It was everything I hoped it would be: the perfect combination of softened sweet squash mixed with the savory notes of the cheese, cream and sage. It may have been one of the best things I’ve ever eaten, and I eat a lot. Our dinner guest thought the pumpkin tasted like pumpkin pizza, minus the sauce.  He suggested rather than me choosing between making this recipe a second time or making the pumpkin pudding, that I should go and find more pumpkins and make this again and again. Like I said: Off. The. Chain.

Given the cost of the Gruyère, I wouldn’t break the bank on a good one. Trader Joe’s carries reasonably priced cheeses. We’re not really big wine drinkers; lucky for us, the liquor store now carries teensy little bottles of wine.  Mine cost $1.99, and I am pretty sure I can get three more pumpkins out of it. My point is: don’t break out the good stuff for this dish. We’re lucky enough to have a sage bush growing in front of our house; please feel free to stop by and pluck some leaves if that’s the only thing stopping you from making this dish.

Cheesy Baked Pumpkin with Gruyère Fondue from Melissa Clark’s In the Kitchen with A Good Appetite

I think I’m a little late to the Melissa Clark fan club, as she has written and co-written dozens of cookbooks. In the Kitchen is how I imagine a good cookbook to be: excellent writing and tales followed by superb recipes. I had this book for less than five hours when I decided that we needed to have the baked flounder and eggs for dinner that night. Clark actually suggests it as a breakfast, which sounds amazing to me. And I’ve made her green goddess dressing three days in a row. She has a new book out this week, and I cannot wait to get my hands on it.

Ingredients

6 (1-inch) slices baguette

½ cup heavy cream

½ cup dry white wine

¼ cup milk

1 large garlic clove, peeled and smashed

3 fresh sage leaves

½ teaspoon freshly ground black pepper

1 (3-4 pound) sugar pumpkin, well-scrubbed

5 ounces grated Gruyère cheese (1 ¼ cups)

1 Tablespoon extra-virgin olive oil

Directions

•           Preheat oven to 425. Cut the baguette slices in half lengthwise and place on a baking sheet. Bake until golden brown, 5 to 7 minutes.

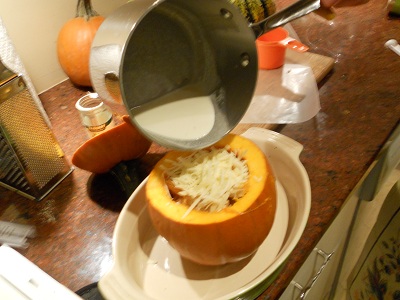
•           In a medium saucepan, bring the cream, wine, milk, garlic, and sage to a boil over medium heat. Reduce the heat to low and allow to simmer for 5 minutes. Take the mixture off the heat and discard the garlic and sage. Stir in ½ teaspoon of salt, the nutmeg, and the pepper.

•           Cut the top off the pumpkin and scoop out the pulp and seeds. (If you want to toast your own pumpkin seeds, and I always do, see the Note below.) Set the pumpkin in a baking dish. Place a layer of bread in the bottom, followed by a layer of the cheese. Poor in a third of the cream mixture. Repeat for 2 more layers and replace the pumpkin lid. Using your fingers, rub the oil all over the outside of the pumpkin and sprinkle on additional salt.

•           Bake the pumpkin until the skin blisters and the flesh is fork-tender, about 1 ¼ hours. Allow to cool in the pan slightly, then slice to serve.

NOTE: I saw this method for toasting squash seeds on Jody Adams and her husband’s new blog The Garum Factory. Like everything Jody does involving food, it’s pretty much perfect.

BONUS TOASTED PUMPKIN SEEDS RECIPE FROM THE GARUM FACTORY: Put the mass of pumpkin pulp and seeds in a large bowl and fill it three-quarters full with water. Work the pulp with your fingers to release the seeds from the fibers. The seeds will float. Skim the seeds and spread them on a sheet pan. Bake in the oven for 3-4 minutes or until dry. Remove the tray from the oven, drizzle a Tablespoon of oil over them, then season with salt, smoked paprika and a pinch of sugar. Smear everything about, then return the pan to the oven. Roast until the seeds are golden brown and crisp, about 8 more minutes.   Use as a garnish, or eat like popcorn with a great beer.

Bonus Cat Photo

Almond Joy

This past December, my friend Rachel and her roommate hosted a small Chanukah dinner party at their apartment. They roasted a chicken, fried latkes, tossed together a salad of mesclun and goat cheese. And then there were the green beans.

I must admit that until this point in my life, most of the green beans almondine I’d had were by way of Bird’s Eye: out of the freezer, into microwave. The foil-wrapped almonds don’t usually make it into the toaster oven and are treated as an optional addition at the table.

But the green beans almondine at this Chanukah party, wow! I may have had two servings of them, then I may have loitered in the kitchen until it was decided that there weren’t quite enough left over to dig around for a small Tupperware. And then maybe, just maybe, I greedily ate the rest of the beans and golden almonds directly from the serving dish. I can’t quite remember if I used a fork for that final mini-serving, or just gobbled them up with my fingers.

There are a few things working together for this dish. One, I think, is to toast the almonds in the saute pan at the beginning and all the way through the making of the dish, rather than separately in a toaster oven or small pan. The second is the mix of butter and olive oil. I’ve actually tried this dish with a bit more butter, making it two tablespoons or so, and it was too buttery. (No, really, there can be such a thing.) Definitely stick with just a tablespoon of each fat.  And there’s the fresh sage, a small but impactful last-minute addition that really ties the beans, nuts and garlic altogether. Finally, and please don’t cringe when I say this, remember to salt liberally every step of the way. The nuts get a little salty because of it, but the beans are just right, and let’s face it: salty nuts are delicious.

I happened to have both green beans and sage in the house this week. The slivered almonds I always have on hand; I store them in the freezer to keep them from spoiling.

Green Beans Almondine

Ingredients

1 tablespoon unsalted butter

1 tablespoon olive oil

1 lb. of green beans, cleaned, ends trimmed

About five cloves of garlic (yes, really) chopped

1/4 to 1/3 cup slivered almonds

Two leaves sage, julienned very thin

Salt

Water

Directions

Melt butter in a saute pan that has a lid on a medium heat. When melted, add the olive oil; it should take no more than 20 seconds for them to make friends. Add the garlic, almonds and a pinch of salt to the melted butter and oil. Stir everything together for about a minute and a half, but make sure your garlic doesn’t brown. You might want to turn the flame down a little bit to make sure that doesn’t happen.

Add the green beans and a pinch of salt. Stir everything together for another minute. Add about 3/4 cup of water, lower heat to medium low and cover pan with lid.

It should take about 20 minutes for the green beans to soften. They will no longer be the bright green they turned when you added the water, but shouldn’t look too dulled, either. About 10 minutes in, do a quality-control bite. Most likely you’ll add another pinch of salt to continue to draw out the beans’ flavor. The nuts will have turned a bit more golden. There should be enough water to steam them the rest of the way, but if you’re scared they’re going to burn, add a few more tablespoons of water. Recover pan. About 10 minutes later, do another check. Chances are the beans will be cooked all the way through. Taste them again. Do they need more salt? If the beans are now soft, stir in the fresh sage and let everything cook together for about two minutes more. If the beans aren’t yet soft enough, cover the lid and cook them for about five minutes or until soft, taste, then add the sage.

Try not to eat too many with your fingers as you cook them.