Return Again

We lost my Great Uncle Harry this year. He really was great. He always had a fun story to tell, or a perfect song to sing. He was a vegetarian and for decades built these wonderful, multilayered Dagwood sandwiches for Shabbat breakfast. We were all lucky enough to visit Uncle Harry and Auntie Julie about two months before he died, because we went to a family reunion in London right around New Year’s. We flew in from Boston; Sylvie, Miriam and Leo flew in from DC; my Cousin Larry and Ashley flew in from New Jersey; and my dad came in from Jerusalem. It was Sylvie’s idea, really. She wanted the kids to meet the British relatives before it was too late — a good call on her part.

Weinbergfest

We were only in London for a couple of days, but we were able to score a table at NoPi. We ordered every vegetable dish on the menu, and a perfect piece of fish. I had a kumquat and passionfruit mocktail and rhubarb Eaton mess. It was everything I wanted it to be. Pro tip: They only have two high chairs in the whole restaurant, and no changing table in their amazing mirrored bathroom, so plan accordingly.

Lilli and I caught something on the plane on the way over, and because I was 20 weeks pregnant and had no immune system, I couldn’t really do much touring. Or stand. Or make conversation. But Rich did get to see a real football match with my cousin Jonah. By the time I made it to my doctor’s office on New Year’s Eve, my temp had spiked to 102.8F. But the trip was still well worth it, and I really miss my Cousin Jenny. Hopefully we’ll get to see Jonah soon; he is in Philadelphia for the year studying at Temple and drinking American beer.

Nopi

It was never the right time to talk about finally eating at Ottolenghi’s restaurant, because it never felt right to talk about Uncle Harry. But it’s Day of the Dead on Sunday, and I’m looking forward to joining my friend Tania and her family for her holiday, so it seems appropriate to honor Harry, as well Rich’s Uncle Tommy and Auntie Ruthie and his professor Svetlana Boym, all of whom we lost far too soon this year.

If I find my blanched almonds in time, I’ll be making this horchata for the occasion. It’s a traditional Mexican sweetened rice drink, and it has become my litmus test of whether a Mexican restaurant is worth my time. Aleza introduced me to the beverage when we stumbled into a real hole in the wall in Williamsburg. This was in 2002, back when there were still holes in walls in Williamsburg.

mirrored bathroom

This particular recipe is from the Ultimate Nachos cookbook, also the cookbook for these pickled red onions I use all the time. The drink is vegan, and you need a blender and an overnight to make it work. Sure, it’s really meant for a hot summer’s day, but I think it will also work at the ofrenda.

Horchata from Ultimate Nachos by Lee Frank & Rachel Anderson

Ingredients

1 cup long-grain rice, rinsed and drained

1 cup blanched almonds

4 cinnamon sticks

1 quart water

¾ cup sugar

2 teaspoons vanilla extract

2 cups ice cubes

Ground cinnamon, to taste

Ingredients

Put the rice, almonds, and cinnamon sticks in a blender. Blend the mixture into a powder.

Add the water, sugar, and vanilla and blend for 90 seconds.

Chill the mixture overnight in the fridge.

Strain the liquid into glasses over ice cubes and serve, sprinkled with ground cinnamon to taste.

A Holiday Meant for Guests

My parents always had a sukkah. It was large and wooden, and my sisters and I loved getting to decorate it before the holiday began. We always hung colorful paper chains and gourds, and sometimes strings of cranberries and popcorn. That was always kind of risky given the large squirrel population of Western Mass.

Be careful, Daddy. Don't fall. I gotchu.

Be careful Daddy. Don’t fall. I gotchu.

Their sukkah was always full of visitors, which is what you’re supposed to do when you have a sukkah. In fact, we are taught that each night we welcome ushpizin – characters from the Bible who each hold a mystical trait: Abraham the first night, who embodies love; Isaac the second night who offers discipline; and so on.

My parents usually had help building it from our handyman, Fitz, a retired firefighter, but one year my parents and another couple – David and John – built it on their own. Afterwards, as they toasted each other with Camparis they joked that only a hurricane could knock it down. Turns out they were right; Hurricane Gloria did, indeed, throw their sukkah across the deck and into the backyard.

crafting

Sukkot, like Passover, has two holy days at the beginning, four regular days in the middle, and two more holy days at the end. There was always a steady stream of people for the entire eight days. My mom always cooked a corned beef for the holy days and a large pot of chili with a side of corn bread for the rest. (Her special secret for moist cornbread: a can of creamed corn.)

By the time I was in college my parents realized how exhausted they were from hosting the world for more than two decades, so they downscaled the large wooden sukkah for a premade one with metal beams and canvas sides. And a few years ago they gave up on the sukkah altogether, deciding to just use the one in the synagogue every night. Sylvie and Miriam drove off with the pieces attached to the roof of their Subaru Outback, and now they put it up in their yard in DC.

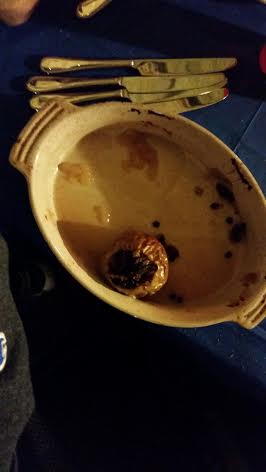
This year Rich, Lilli and I were lucky enough to help decorate our friend Eric’s sukkah. You might remember him as the one from whom Lilli so brazenly stole food a few years ago. Eric’s sukkah is very large; he actually hosts a Sukkot barbeque every year for our synagogue. This year he had us over for the first night of the holiday. I brought a refreshing cucumber salad, a dish my mother always made to go with meat meals growing up. I also made a very peculiar sweet potato kugel (a recipe in progress) and for dessert, baked apples, something my mother always, always, always served for dessert at Sukkot.

I had worked out a recipe in my head but called my mom for things like oven temperature and baking time. “Oh, how funny,” she said. “I was just thinking about making baked apples for tonight.” Well, duh, it’s Sukkot. She actually had a Martha Stewart cookbook out, which has you preheat the oven to 375F. My mom and I both agreed that is a lie, kind of like when a recipe says to cook the onions until they’re translucent, “between five and seven minutes.” We both agreed the oven would have to be at least 400F to get anywhere close to a baked apple you can cut with a fork.

lulav

I poked around online and most recipes call for brown sugar which is supposed to caramelize in the oven. We’ve never used brown sugar. It is New England, so maple syrup all the way.

The apples I used are Fujis which are much sturdier in the oven than a Macintosh. Any hearty apple will do, but please, no Red Delicious. Make sure their bottoms are flat so that they stand upright in the pan and on your plate. I used a paring knife to start coring the apples and changed over to a rounded teaspoon to scrape away at the core. A melon baller or small ice cream scoop will also work.

I think walnuts work best here but check with your guests ahead of time to make sure no one is allergic to them. There was an incident at a potluck last weekend, and Sylvie had to get epi-penned and rushed to the hospital because of walnuts lurking in a veggie burger. I had currants around because I made this caponata for Rosh Hashana, but raisins will also work.

baked apple

These apples are parve and vegan, and are great for a dessert, a snack, or even a nice breakfast. I start the apple pan in a tented steam bath, kind of the way I roast my cauliflower.

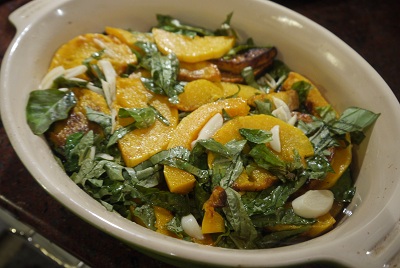
I hope you get a chance to make these before Sukkot is over. It’s our harvest holiday, so extra points if you use apples you’ve personally picked from an orchard. Hopefully you’ll eat these after a meal where this butternut squash dish is served. That recipe is particularly fantastic.

Baked Apples

Ingredients

Five medium to large apples with flat bottoms

1/4 cup dried apricots, slivered

1/4 cup raisins or currants

1/4 cup chopped walnuts

1/4 cup maple syrup

1/2 teaspoon cinnamon

Directions

Preheat oven to 425F

Mix the dried fruit, nuts, cinnamon and maple syrup in a small bowl. Set aside.

Carefully core the apples, making sure to stop about an inch from the bottom.

Using a small spoon, carefully ladle the fruit and nut mixture into each hole.

Stand the apples upright in a baking dish with sides. Pour enough water to cover the bottom of the dish. Cover with foil. Slide into the oven. At around the 20-minute mark, carefully remove the foil, then bake them for another 20 minutes, checking periodically. You will know they are done when they are very wrinkled. They will be soft enough to cut with a fork.

Counting Blessings

We had some scary moments this weekend, which culminated in an overnight stay at Children’s Hospital. They are very nice there, but it’s a place you’d rather never be. Thank goodness, it was all just a scare, and I have two healthy daughters.

Bea at Children's

Mostly it was a lot of waiting for test results, and so I found myself with something I haven’t had a lot of: time. (Big sister was with her grandparents.) I got to read two back issues of Food and Wine, something I just don’t have the time to do right now. Sylvie and Miriam actually had Indian food delivered to our room on Saturday night, and I enjoyed the leftovers this morning as my Sunday brunch. It was great Indian food — my stepdad calls it the $10,000 meal.

I kept in contact with my family via text. This morning, as I texted Sylvie a third time to thank her for the for the awesome food, we fell into a discussion about Rosh Hashana meal planning. I’m hosting for the first time in my life next week, and I’m busy plotting my menus and testing out recipes. Soon we moved to the phone to really have a conversation about the meals.

We are in a book

One of my guests first night is a pregnant woman allergic to quinoa. (Apparently this is an allergy they find they need to mention when they are hosted by Jews.) The second night there will be a vegetarian allergic to soy. I don’t do a ton of soy things, although I did just break the code on stir fried green beans of my adolescence last week. (More on that in a future post.)

I’m still figuring out a lot of the menus, but I am pretty sure I’m going to make this Ottolenghi fish dish. It’s tradition to serve fish on Rosh Hashanah — fish head, actually, but close enough. Ottolenghi calls its sweet and sour fish, but it’s more sweet than sour —  perfect for the new year, and very delicious. Ottolenghi suggests “serving it at room temperature, preferably after resting for a day or two in the fridge, with a chunk of bread.” I can confirm this, so I plan on making this on Saturday night for Sunday.

It's good to be home

When I tested this recipe last week I used four pieces of frozen cod from Costco that I always keep on hand. “Small whole fish are also good here: red mullet, sardines, or a small mackerel, scaled and gutted,” writes Ottolenghi. The peppers and tomatoes are end of summer foods at their finest hour.

Marinated Sweet & Sour Fish from Jerusalem by Yotam Ottolenghi

Ingredients

3 Tablespoons olive oil

2 medium onions, cut into 3/8-inch/1cm slices (3 cups/350 g in total)

1 Tablespoon coriander seeds

2 peppers (1 red and 1 yellow, halved lengthwise, seeded and cut into strips 3/8 inch/1 cm wide (3 cups/300 g total)

2 cloves garlic, crushed

3 bay leaves

1 1/2 Tablespoons curry powder

3 tomatoes, chopped (2 cups/320 g in total)

2 1/2 Tablespoons sugar

5 Tablespoons cider vinegar

1 lb./500 g pollock, cod (sustainably sourced), halibut, haddock, or other white fish fillets, divided into 4-equal pieces

seasoned all-purposed flour, for dusting

2 extra-large eggs, beaten (I used large)

1/3 cup/20g chopped cilantro

salt and freshly ground black pepper

Directions

Preheat the oven to 375F/190C

Heat 2 tablespoons of the olive oil in a large ovenproof frying pan or Dutch oven over medium heat. Add the onions and coriander seeds and cook for 5 minutes, stirring often. Add the peppers and cook for a further 10 minutes. Add the garlic, bay leaves, curry powder and tomatoes, and cook for another 8 minutes, stirring occasionally. Add the sugar, vinegar, 1 1/2 teaspoons salt, and some black pepper and continue to cook for another 5 minutes.

Meanwhile, heat the remaining 1 tablespoon oil in a separate frying pan over medium-high heat. Sprinkle the fish with some salt, dip in the flour, then in the eggs, and fry for about 3 minutes, turning once. Transfer the fish to paper towels to absorb the excess oil, then add to the pan with the peppers and onions, pushing the vegetables aside so the fish sits on the bottom of the pan. Add enough water just to immerse the fish (about 1 cup/250ml) in the liquid.

Place the pan in the oven for 10 to 12 minutes, until the fish is cooked. Remove from the oven and leave to cool to room temperature. The fish can now be served, but it is actually better after a day or two in the fridge. Before serving, taste and add salt and pepper, if needed, and garnish with cilantro.

An Apple (Cake) a Day

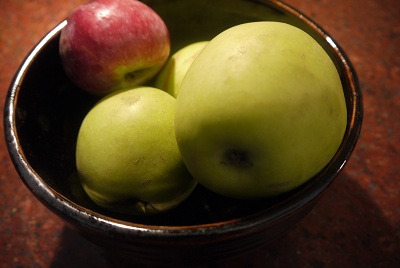
Last week the acupuncturist told me that apples are full of qi and that I should be eating one every single day. “Oh, that’s not a problem at all,” I quickly replied. “The CSA gives us pounds of apples every week, and I’ve been baking apple cakes pretty constantly this year.”

“We really need to work on your filter,” Rich observed, not for the first time, when I recounted the conversation. But it’s true, I’ve been on a bit of an apple cake tear. This gingerbread upside down cake with apples and bourbon cream by Sally Pasley Vargas might be the best apple cake I’ve ever had. Jess’ Teddie’s was another good one; we loved the walnut crunch. We each made a set of these apple chunk breakfast loaves from Liz. The second round was brought to my parents for Rosh Hashana for a nice breakfast cake. I think the apples she found at her shuk in Israel are much smaller than my stateside apples, because I could only squeeze in two per recipe, as opposed to her four. This one, also by Sally, was pretty good, although I think I’d reduce the cinnamon in the topping the next time. And this Dutch Apple Cake from last year is always a fine treat.

But I digress. Anyways, I’ve been following the acupuncturist’s advice all year long, and I’ve been feeling great, so I figured it’s best to do what she says.  I’ve incorporated a peeled apple (sans skin; better for my tummy) with some peanut butter in its core as part of my breakfast on most mornings, although I’m still on a constant lookout for new apple recipes.

So when the good people at Knopf asked me if I was interested in checking out Lidia Bastianich’s new cookbook that she wrote with her daughter, Tanya Bastianich Manuali, I immediately said yes. I think I’ve mentioned in the past how much I adore Lidia – her show on WGBH Create is one of the few cooking shows I watch, and I am a big fan of her Lidia’s Italy cookbook. Although, looking through my archives right now, I don’t think I’ve ever shared a recipe of hers with you. Strange, because I’m a huge fan.

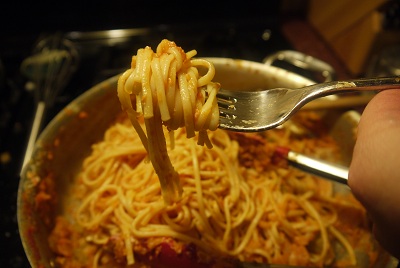
When the new cookbook arrived, I did a quick read of the introduction and looked over the “100 Foolproof Italian Dishes, from Basic Sauces to Irresistible Entrées” in hopes of a new apple cake recipe to use up the bowlful on my counter. Sure, there was a strudel, and a roasted beet and beet greens salad with goat cheese, but the recipe that caught my eye was like none I’d ever heard of before: Spaghetti in Tomato Apple Sauce. We actually don’t eat a lot of pasta in this house, but the acupuncturist also did encourage the eating of deep red and colorful fruits and vegetables, so a dish involving bright red tomatoes and apples piqued my interest.

Lidia does note in the introduction to this recipe that the combination of the two might sound “odd,” but apparently in Tretino-Alto Adige, one of the most northerly regions of Italy which is known for its apples, this recipe wouldn’t be too surprising.

My back was feeling a bit cranky, so I assigned Rich the task of putting together this dish. (This actually served the dual purpose of keeping me off my feet, and seeing how well-written the recipe works for the kitchen novice.) The result? It was incredible. Honestly, one of the better pasta dishes I’ve had in my life.

We continued to cook our way through the CSA with this cookbook, enjoying the butternut squash in the marinated winter squash, and the chard melted ever so nicely when I braised it with tomatoes and cannellini beans. I think tonight I’m going to try out the Brussels Sprouts braised with vinegar for a new take on a beloved vegetable. (At least it is in our house.)

Spaghetti In Tomato Apple Sauce from Lidia’s Favorite Recipes: 100 Foolproof Italian Dishes, from Basic Sauces to Irresistible Entrees

One thing I noticed about this recipe was that it called for a food processor or blender to purée the tomatoes. I’m a big believer in the food mill, but it looks like Lidia has acknowledged that there is more likely a chance of a home cook having one of those two machines than an old-fashioned food mill. This shouldn’t stop you from purchasing a food mill. It’s almost winter time, and the persimmon pudding won’t make itself!

I would also suggest putting the pasta water on to boil before starting on the sauce. Big pots of water take a while to boil, even if you’re not watching them.

Ingredients

3 cups canned Italian plum tomatoes (preferably San Marzano)

6 Tablespoons extra-virgin olive oil

2 large stalks celery, cut into 1/4 –inch dice (about 1 cup)

1 medium onion, chopped (about 1 cup)

1 teaspoon kosher salt, plus more for the pasta pot

1 pound tart and firm apples, such as Granny Smith

1 pound spaghetti

1 cup freshly grated Grana Padano or Parmigiano Reggiano cheese, plus more for passing

Directions

Pour the canned tomatoes into a food processor or blender, and purée until smooth.

Pour 4 tablespoons of the olive oil into a skillet, set it over medium heat, and strew the celery and onion in the pan. Cook and stir the vegetables for about 5 minutes, until they wilt and start to caramelize. (Rich says this took a lot longer than 5 minutes.)

Stir in the puréed tomatoes, season with the salt, and heat to a bubbling simmer. Cook, stirring occasionally, for 5 minutes or so. As the tomatoes perk, peel and core the apples, and remove the seeds. Shred them, using the coarse holes of a shredder or grater.

When the tomatoes have cooked about 5 minutes, stir the apples into the sauce. Bring the skillet back to a simmer, and cook the sauce, uncovered, for about 15 minutes, stirring now and then, until it has reduced and thickened and the apple shreds are cooked and tender.

Meanwhile, bring a large pot of salted water to a rolling boil, drop in the spaghetti, and cook until just al dente. Lift the spaghetti from the water, let drain for a moment, and drop it into the warm sauce. (Reheat if necessary.)

Toss the pasta with the sauce for a minute or two, until all the strands are coated and perfectly al dente. Turn off the heat, sprinkle the grated cheese over the pasta, and toss well. Drizzle over it the remaining olive oil, toss once again, and heap the pasta in warm bowls. Serve immediately, passing more cheese at the table.

(Un)seasonal

kosher vegetarian

“It was like hundreds of gunshots.” That’s how one family friend described the sound of tree branches snapping and falling to the ground last Saturday evening. Western Massachusetts’ best asset, the foliage that people travel from around the world to see, proved to be its undoing during this very early Nor’easter. My little town, Longmeadow, was hit with 12 inches of snow, which fell onto trees still wearing their autumn finest. The combined weight of snow and leaves proved too much for the branches, which took out power lines as they crashed down. Most of the town has been without power since Saturday night. My parents, who had no electricity or heat, were our houseguests until today, when they got word that their power was restored.

One friend from high school reported that her parents said it will be 100 years for our town to once again look like the town we grew up in. A century is a long time, although it’s doable for my town. Settled in 1644, we still celebrate an annual May festival on the town green, a long strip of grass on the outskirts of town that farmers would take their cattle out to pasture on. Lining the green are colonial houses, marked with stars to indicate their historic status. It is believed that John Chapman, better known as Johnny Appleseed, once lived in one of those houses. His myth continues, even if many of his trees do not.

In just a few weeks, it will be my 15 year high school reunion. I’m a little nervous to return to see a town so different than the one I left.

This simple recipe is from one of our favorite cooking shows on PBS: Caprial & John’s Kitchen. It’s not just the recipes in the show, but the chemistry this real-life married couple has on screen. Well, calling it chemistry isn’t exactly accurate; it’s more like watching a married couple who have to work, cook, and go home together. There’s a lot of correcting by Caprial to anything John does or says. Example: John will suggest a shortcut to the viewer, which Caprial will promptly veto as a terrible idea. We showed an episode to our friend Ben, a clinical psychologist, and he dubbed them the passive-aggressive chefs. But judging by this recipe, it’s working for them.

Roasted Apples with Shallots and Thyme

5 apples, peeled, cored, halved and sliced into quarters

5 shallots (about ¾ cup), peeled and halved

1/2 Tablespoon of fresh thyme (about 4 sprigs)

2 Tablespoons olive oil

Pinch of salt

Directions

Place a metal pan in the oven and preheat it to 500.

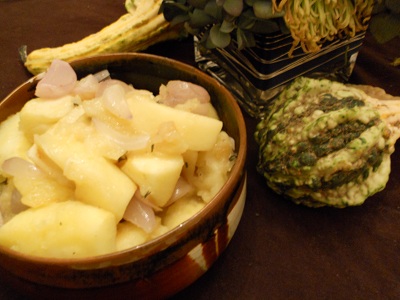
Toss apples, shallots, thyme, olive oil and salt in a bowl. Carefully pour the ingredients into the piping hot pan – it will sizzle – and close the oven door. After 5 minutes, give them a stir with a wooden spoon. Close the door, and check them again in another five minutes and give a stir. Follow up one more time, for a total of 15 cooking minutes. The apples will have softened, many will have completely lost their shape and integrity, making an herbed, savory apple dish. This will make a wonderful side dish for your Thanksgiving table.

UPDATE: I sauteed these leftovers with some frozen pierogies last night for dinner and it was really terrific.

Beet Maestro

I recently came across this essay from Chez Panisse alum Tamar Adler’s new book, An Everlasting Meal: Cooking with Economy and Grace. I think the opening line really sums up an excellent life rule: “A salad does not need to be a bowl of lettuce. It just needs to provide tonic to duller flavors, to sharpen a meal’s edge, help define where one taste stops and another begins.” The entire essay is worth reading, especially in these upcoming months when our summer tomatoes are a distant memory. Root vegetables, Ms. Adler reminds us, can do much more than serve as a warm starch on the side of a plate.

Of course, root vegetables require a little more work than summer veggies. Beet preparation in particular, I have discovered by trial and error, can be a messy, messy undertaking. As much as I love steaming, pressurizing, and grating the root, the collateral damage of peeling – garnet-stained hands – can be frustrating, especially when hosting dinner guests. As a result, roasting has become my go-to beet prep method; it is the easiest, cleanest and tastiest method. At least that’s what I’ve come to believe, anyways.

I think I’ve mentioned this before, but as the Suzuki method has taught us, if I catch you early enough in your beet journey, and with constant repetition, you, too, can be a beet maestro. If you’re ever at home for more than an hour, crank up the oven to 400. Fully wrap each beet in a piece of tin foil, place them on a baking sheet to prevent drips onto your oven floor, and roast away.

Beets are very low-maintenance, so now you’re free to do whatever you want. My own tastes run towards petting the cat, reading library books, and/or catching up on the latest news via Perez Hilton – or, um, I mean, working out.

At around the 50 minute mark, test your tin-foiled beet by sliding a fork into it. If the fork does not easily slide in and out, give your beets another 10 minutes and test them again. Repeat this method until the fork pierces the beet with little to no effort, then remove from the oven. Once the beet is cool enough to handle, open the foil, head on over to the sink, stick the beet into a stream of running water and rub off the skin. It will be quick and clean, but make sure to wear an apron, just in case.

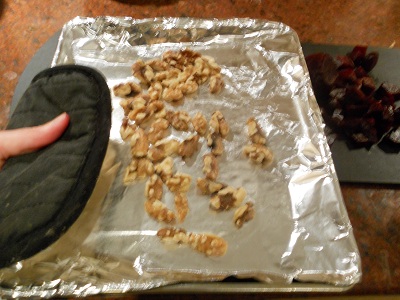
And turning your beets into an Adler-esque salad is almost as easy as roasting them. Just toss them with a quarter cup of roasted nuts and a drizzle of vinegar and olive oil. The only real work involved in this dish is making sure your nuts don’t burn. Think 325 for about seven minutes, with an eagle eye and the nose of a bloodhound.

I usually toast my nuts in the toaster oven my friend Brian bought me with his Jeopardy winnings.

(A fresh apple or two, diced into the same sizes as the beets would be a nice addition to this salad. I did not, however, add them to this salad, because fresh apples give me a bellyache, and I am going to eat this salad now that it’s been photographed.)

This blog post and ridiculously simple recipe was in support of Sweet Local Farm’s Home Grown Food Challenge.

Off The Chain

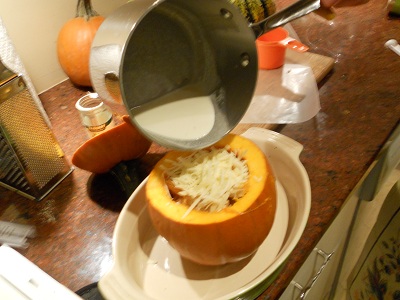
In July, as I was savoring peaches whose juices dripped down my wrist and fresh corn on the cob that required a good flossing after munching, I started wishing it was October. It was in July that I found a recipe in Melissa Clark’s In the Kitchen with A Good Appetitefor a pumpkin whose empty shell had been thoughtfully stuffed with alternating layers of toasted baguette, Gruyère, and a sauce of heavy cream and white wine steeped with sage and nutmeg. “I found this recipe,” I would say to Rich, my sister, friends, the cat – really, anyone in ear shot — “that is going to be off the chain. Off. The. Chain.”

Well, it’s finally October, which means some of the best foods of the whole year – butternut squash, beets, arugula, cauliflower and, wait for it, pumpkins – have started to appear at markets and in CSA boxes around town.  Two weeks ago, my weekly CSA list noted an inclusion of a sugar pumpkin, which meant I was this close to fulfilling my stuffed pumpkin dream.

When I arrived at the student union for my usual Thursday pick up, there was a new girl checking off names. It was obvious there was no pumpkin in my box, and, even more frustrating, there was an enormous pile of sugar pumpkins on display right next to her. Rather than putting her on the spot, I thanked her for my pumpkinless box and brought it back to my office. Naturally, the only thing to do was call the farm and see how I could go about getting my rightful pumpkin at the next week’s pickup. They were totally cool about it; apparently I was the only person who either did not get their promised pumpkin – or who was crazy enough to actually call them about it. “There’s a pumpkin shortage this year!” I tried to explain to Rich.

Well, this week I received my promised pumpkin, as well as a new pumpkin in my box. So now, I can either make this dish twice, or use the second one for a terrific pumpkin pudding recipe I stumbled upon last year around this time.

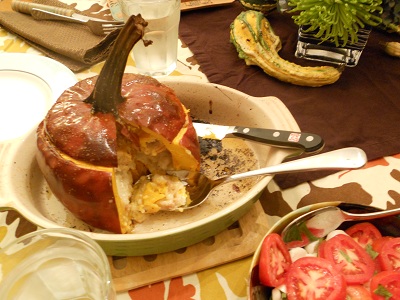
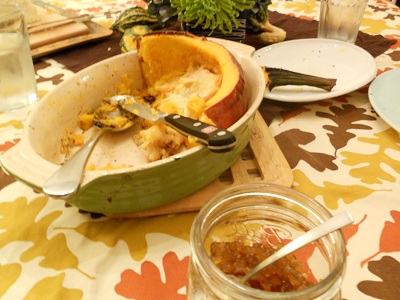
Friday night we finally had the pumpkin of my dreams. It was everything I hoped it would be: the perfect combination of softened sweet squash mixed with the savory notes of the cheese, cream and sage. It may have been one of the best things I’ve ever eaten, and I eat a lot. Our dinner guest thought the pumpkin tasted like pumpkin pizza, minus the sauce.  He suggested rather than me choosing between making this recipe a second time or making the pumpkin pudding, that I should go and find more pumpkins and make this again and again. Like I said: Off. The. Chain.

Given the cost of the Gruyère, I wouldn’t break the bank on a good one. Trader Joe’s carries reasonably priced cheeses. We’re not really big wine drinkers; lucky for us, the liquor store now carries teensy little bottles of wine.  Mine cost $1.99, and I am pretty sure I can get three more pumpkins out of it. My point is: don’t break out the good stuff for this dish. We’re lucky enough to have a sage bush growing in front of our house; please feel free to stop by and pluck some leaves if that’s the only thing stopping you from making this dish.

Cheesy Baked Pumpkin with Gruyère Fondue from Melissa Clark’s In the Kitchen with A Good Appetite

I think I’m a little late to the Melissa Clark fan club, as she has written and co-written dozens of cookbooks. In the Kitchen is how I imagine a good cookbook to be: excellent writing and tales followed by superb recipes. I had this book for less than five hours when I decided that we needed to have the baked flounder and eggs for dinner that night. Clark actually suggests it as a breakfast, which sounds amazing to me. And I’ve made her green goddess dressing three days in a row. She has a new book out this week, and I cannot wait to get my hands on it.

Ingredients

6 (1-inch) slices baguette

½ cup heavy cream

½ cup dry white wine

¼ cup milk

1 large garlic clove, peeled and smashed

3 fresh sage leaves

½ teaspoon freshly ground black pepper

1 (3-4 pound) sugar pumpkin, well-scrubbed

5 ounces grated Gruyère cheese (1 ¼ cups)

1 Tablespoon extra-virgin olive oil

Directions

•           Preheat oven to 425. Cut the baguette slices in half lengthwise and place on a baking sheet. Bake until golden brown, 5 to 7 minutes.

•           In a medium saucepan, bring the cream, wine, milk, garlic, and sage to a boil over medium heat. Reduce the heat to low and allow to simmer for 5 minutes. Take the mixture off the heat and discard the garlic and sage. Stir in ½ teaspoon of salt, the nutmeg, and the pepper.

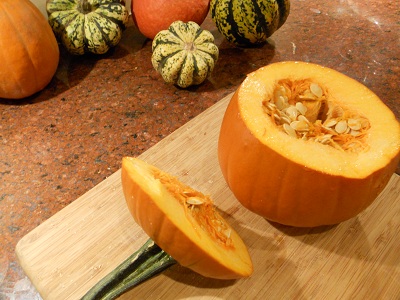
•           Cut the top off the pumpkin and scoop out the pulp and seeds. (If you want to toast your own pumpkin seeds, and I always do, see the Note below.) Set the pumpkin in a baking dish. Place a layer of bread in the bottom, followed by a layer of the cheese. Poor in a third of the cream mixture. Repeat for 2 more layers and replace the pumpkin lid. Using your fingers, rub the oil all over the outside of the pumpkin and sprinkle on additional salt.

•           Bake the pumpkin until the skin blisters and the flesh is fork-tender, about 1 ¼ hours. Allow to cool in the pan slightly, then slice to serve.

NOTE: I saw this method for toasting squash seeds on Jody Adams and her husband’s new blog The Garum Factory. Like everything Jody does involving food, it’s pretty much perfect.

BONUS TOASTED PUMPKIN SEEDS RECIPE FROM THE GARUM FACTORY: Put the mass of pumpkin pulp and seeds in a large bowl and fill it three-quarters full with water. Work the pulp with your fingers to release the seeds from the fibers. The seeds will float. Skim the seeds and spread them on a sheet pan. Bake in the oven for 3-4 minutes or until dry. Remove the tray from the oven, drizzle a Tablespoon of oil over them, then season with salt, smoked paprika and a pinch of sugar. Smear everything about, then return the pan to the oven. Roast until the seeds are golden brown and crisp, about 8 more minutes.   Use as a garnish, or eat like popcorn with a great beer.

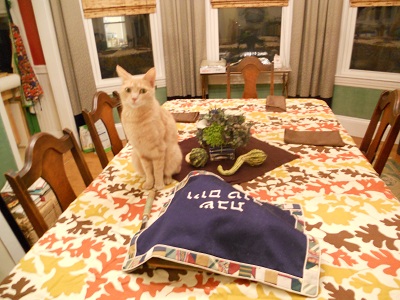
Bonus Cat Photo

Bridging the Seasons

I’m writing this while wearing my slippers, which I had to dig out of the front hall closet. The cat is curled up like a cinnamon bun in Rich’s lap, hoping to enjoy his body warmth (and vice versa).  This week’s CSA box had both a butternut squash and six ears of corn – one box, two seasons. Summer is tiptoeing its way out and fall is tap dancing its way in.

Fresh corn pudding, I have discovered, is the perfect mix of late summer and early fall. Each creamy bite of this comforting dish is both sweet and savory, a reminder of why this time of year is my favorite food season. This recipe is from Deborah Madison’s America: The Vegetarian Table, which is where I found the persimmon pudding recipe. What can I say, the woman knows her puddings!

Fresh Corn Pudding by Deborah Madison

Ingredients

18 saltine crackers, or ¾ cup cracker crumbs or fresh bread crumbs

6 large ears of corn

1 ½ Tablespoons corn oil or butter

1 cup finely diced yellow onions

1 teaspoon minced garlic

1 cup evaporated milk

2 eggs, lightly beaten

2 cups loosely packed orange Colby or mild Cheddar cheese

Salt and freshly ground pepper

Paprika

Directions

Preheat oven to 350 degrees F.

Lightly butter a 6-cup shallow casserole or gratin dish. If using saltines, put them in a bag and roll over them with a rolling pin to make coarse crumbs. There should be about ¾ cup. Set aside. Shuck the corn and pull of the silks. If you slice your corn in a deep bowl, you’ll keep it from spattering all over. Holding an ear of corn stem end down and using a sharp knife, carefully cut off the top halves of the corn kernels; do not include the fibrous base, the part that gets caught in your teeth. Then turn your knife over and, using the dull side, press it down the length of the cob, squeezing out the rest of the corn and the milk. You’ll end up with a mushy substance in the bottom of the bowl along with the kernels. Repeat with the remaining ears.

Warm the oil or butter in a skillet over medium-high heat. Add the onions and cook just until limp, about 4 minutes. Add the garlic and cook for 2 to 3 minutes without letting the onions brown. Add this to the corn and stir in the milk, eggs, 1 cup of the cheese, and ½ cup of the cracker crumbs. Season to taste with salt and pepper. Transfer the mixture to the prepared dish and top with the remaining cracker crumbs and cheese. Bake on the center rack of the oven until puffed and golden, about 45 minutes. Remove from the oven, sprinkle paprika over the top, and serve.